Color of Stars
The color of stars can confuse students. Think about our own perception of fire. Fire glows red/orange and is hot, right! We want to place a label on that-red/orange fire is hot. Red/orange means hot in all aspects of our life-a stove is red/orange! HOT-don't touch! But, in reality, red/orange is cool in the range of heat output. We just have this preconceived notion that RED means HOT! Stars that are red/orange are the coolest stars. Blue and white stars are the hottest stars. Kids are like us. They want to apply red/orange stars as HOT, but they aren't. This is a misconception that needs to be addressed when studying stars.
Size of Stars
Bigger is better, right! When it comes to types of stars-NOT TRUE! Big stars a dying stars. They have burned through their fuel and are heading toward death. Small stars are fully fueled and are just beginning their lives. This misconception needs to be addressed when studying stars!
Distance of Stars
Stars appear on a plain - a flat "surface" to us. Stars are really at a wide variety of distances from Earth, creating this misconception of a flat, one dimensional surface when we look at them. And, after all, they are all the same size on that plane, right!
See the problem of misconceptions building up! These are REAL problems when teaching types of stars!!! So, how do we address these misconceptions? How about a STEM activity!
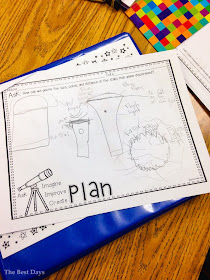
I developed this STEM to try and undo the misconceptions that I saw my students struggling with-the very ones I just shared with you! I could not find a way to communicate the properties that we were discussing in a way that students grasped them at a deeper level. There had to be some kind of hands-on activity out there! But, there wasn't! This Star STEM was birthed out of the very cosmos! It had to make things easier - or so I thought!
Starting Off Strong
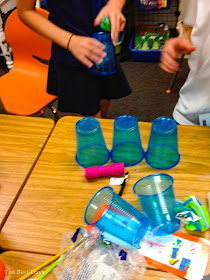
Students were super excited to start this STEM! They brought a variety of flashlights from home and I purchased some different sized flashlights for cheap at The Dollar Tree and other stores! You will need flashlights from very small to very large to represent each type! I also bought tissue paper and some other "star" making materials. You will need packing tape-a lot of it-too! Makes sense, right!
WRONG! Students jumped on the color first! They where using things like their red pencil boxes with the light shinning through it! I would say ROUND and it was like I was speaking a different language-because color was key to them! In fact, one team began creating this blue monster! I couldn't figure out what in the world they were doing! They not only missed ROUND, they missed a star is in space! They were creating EARTH! So, be sure they truly understand the properties involved. Even though this was clearly discussed, and redirected to teams, it did not become the focus of what they were doing!
Misconceptions can lead students away from the goal of learning when the
concept is higher than we realize!
Finishing STRONG!
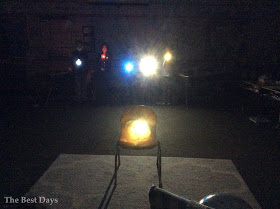
We did get every team focused on the correct properties. We did get every team creating one type of star that represented the size and color that they needed. It was well worth the effort! Because, next came testing! And testing these was where it is AT! Suddenly, they could SEE what happens in the night sky with distances! We tested a number of combos of stars and locations in the room. I had assigned "distances" in the classroom and set up Polaris as the closest star (my design was used for Polaris) on a chair in the front of the room. As we changed out stars and students in "space" we were amazed to see how star sizes appeared the same and how color didn't matter to differentiate a size. They blurred into one sky, even within the classroom! I also used an iPad to take pictures so that we could flip the lights on and examine the evidence in picture form!
In the end, we did finish strong with our study of types of stars! We did internalize the idea that viewing them from Earth does not mean that they are all the same distance or the same size! We did internalize that space has greater distances that can make the size of a star appear smaller than those closer to us! And that is what made this STEM so awesome! It was the very objective that this lesson was supposed to show-because that one is the most complex of all the objectives in teaching types of stars!
 |
| These stars are on a plane. You can see that their size and color are shown. These are Red Giants and Orange Stars. |
 |
| Create Polaris to judge brightness and distance, just like real astronomers do! |
As always, let me know what you think! I'd love to hear what you have done in your classroom with types of stars! You can add a comment here or join me over at Facebook and Instagram to share your thoughts! I'd love for you to join me there!
(Find out how I hacked this rubric for my teacher observation here!)
(Find out how I hacked this rubric for my teacher observation here!)


I have been looking around for this kind of information. Will you post some more in future? I’ll be grateful if you will.
ReplyDeleteStudent Flat in New york
Hi! I am so excited to implement this STEM project in my classroom. I am struggling to get the video to work. I am assuming it gives a lot of the information needed to know how many different kind of stars there are. Help!
ReplyDelete