Image Map
Showing posts with label Creativity. Show all posts

June 6, 2019

Why Contraction Surgery Succeeds!

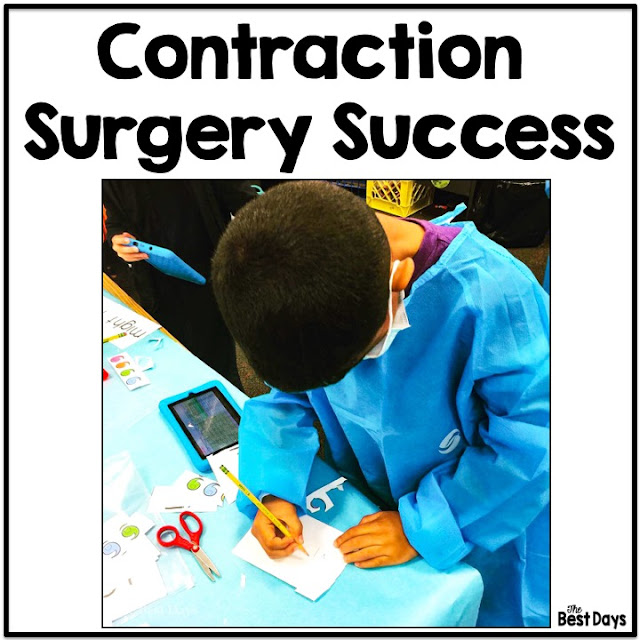
Contraction Surgery is such a simple, yet wonderful, way for your students to succeed at learning contractions!  Often we think and believe that contractions are an easy skill for students to learn and understand.  When we apply a project to this skill, it becomes a delicate art of skill and knowledge hidden in the fun of Contraction Surgery


Student engaged in Contraction Surgery.


My interest in Contraction Surgery started years ago when I saw a simple pin online, even before Pinterest was a hot spot for ideas.  Just the picture alone got my mind spinning!  I was teaching first grade at the time and thought, "I'm going to do this!"  I created this product, and headed on my merry way!  And it was FUN!  

After being away from Primary teaching for a few years, I have returned to Second Grade with the promise in my heart to complete Contraction Surgery again, and really dive into discovering why it is such a success!  


Why is it a Success?

Contraction Surgery wraps two things together that make it a success.  These two things are hands-on learning and FUN!  Yes, I said it, FUN!  Imagine that in today's learning environment!!  So, let's start there!


Students are engaged in Contraction Surgery

FUN!

Contraction Surgery is FUN if you make it so!  You don't have to create a total classroom transformation for this to happen.  I did something simpler.  I added some blue Dollar Tree table cloths to the ceiling for a "operating room" feel, bought some masks and gloves from Walmart, and, with the help of another teacher on my team who participated with this in her room, gave students hospital gear to wear!  (Donations from doctors offices and emergency rooms can help you gather these things too!) 


This classroom is set up for Contraction Surgery!


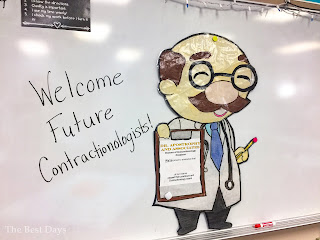
I dressed in a super cheap scrub from Walmart! Our Dr. Apostrophe decorated our board and welcomed our "Contractionologists" into the surgery suite!  


Contraction Surgery Dr. Apostrophe welcomed students to their surgery day!

 I also hit the bulletin board paper room for the "surgery table" covers.  I also rolled out a long piece of paper on the floor for our "patients" to "recover" on.  All this set the stage to engage and get the kids ready for FUN!  These steps are so simple too, so don't skip over these fun little extras!  


Student table is set up for Contraction Surgery

Hands-On Learning!  

Don't underestimate the lack of understanding students may have with contractions!  Contraction Surgery provides the opportunity for students to manipulate the word cards in a way that goes to their higher-order thinking. They must analyze the word and work to create the new contraction.  Many times we take it for granted that students just "know" the two words, because we use contractions all the time in our conversations.  But, in reality, this activity makes them deconstruct their knowledge of contractions and work in a backwards thinking process.  I "know" contractions, but now I have to apply my knowledge to the process in front of me-much more difficult than we can imagine.  To scaffold this instruction, I allowed my students to access a contraction list and to "consult" with one another!  


Students enjoy helping each other with their Contraction Surgery work!


I also allowed students to perform "emergency measures" on words that were incorrectly formed.  This meant that other students could pick up "dying" patients from the recovery room and fix the contractions they found were errors.  We saved these to be talked about later!  

So, as you can see, although we think contractions are easy for students to apply and learn, it, in many ways, is an opposite situation!  By creating a fun, safe environment through Contraction Surgery we can allow them to practice the process in a way that is both memorable and fun!  


Contraction surgery was a BLAST! I had completely forgotten how amazing it was! It was engaging, rigorous, and fun all in one! And guys, we are making assumptions about what kids know about contractions! I had most of my class needing to access our Kindles and Enchanted Learnings list to feel successful at this! They learned a lot and had a great time doing it! Product link in the bio!! Honestly an amazing process and so worth the time!! • • • #secondgradeteacher #secondgrade #secondgradefollowloop #secondgradetribe #secondgradeteachers #secondgradefun #secondgradesquad #secondgradeshenanigans #2ndgradeteacher #2ndgraderocks #2ndgradeclassroom #2ndgradeswag #2ndgradefun #iteachsecond #iteach2ndgrade #iteachsecondgrade #iteach2nd #classroomtransformation #teachersfollowingteachers #contractionsurgery #teachingcontractions
A post shared by Julie from The Best Days (@thebestdaysclassroom) on

And, what's even better is that it doesn't have to stop there!  You can provide additional practice with contractions in this product!  In addition to getting everything you need to make your Contraction Surgery a success, you get additional practice pieces!  


Click to find Contraction Surgery in my TpT Store!


AND, so fun items to make a great page in a school memory book or just to take home to hang on the fridge!  

I'd love to hear your thoughts on Contraction Surgery, so drop a comment below!  Also, to check out all the things going on in my classroom, I'd love for you to follow me over at Instagram or Facebook too!  


Pin for later!  


Contraction Surgery set up!


November 21, 2017

Gobbling up Some STEM Experiences!


One way to enjoy a holiday is through STEM activities.  I am just venturing into STEM and it seems like a perfect fit for Student-Led Learning.  While I was thinking about what to do with the two days before Thanksgiving, STEM came to mind!  Why not?!  The students' brains would not be able to do much, they would loose whatever learning we were doing over the long weekend, and, well, I would be just to tired to teach-period!  Also, I have viewed STEM as a fun adventure-up until creating and implementing one!  

I knew I wanted to think of my very own idea!  The way I learn how to create something new is by developing something from start to finish.  I have always been this way.  It allows my brain to cycle through a cycle.  I know that's a lot of cycles, but that is truly what it does.  Suddenly, the Turkey Hotline popped into my head and that's where I went-turkey thawing!  Yep, but HOW?!  How do I implement such a crazy thing for kids!  

Here's how it went down!  First, I shared the basic concept with my students. I designed the pages in the Holiday STEM:  Thaw a Turkey to be both printable pages and a PowerPoint presentation. 


Then they dove into the process.  I designed this with the idea that they would complete the activity in two days.  The first day, students worked through the Ask, Imagine, Plan, and Create stages.  This took very little time actually.  In less than an hour students had worked through these stages and created their thawing devices.  Here they are! 


So, where were the "turkeys"?  My school has a freezer in the office.  Once I got permission, I started the freezing process there.  Then, the second morning, I sent students to the "grocery store" to pick up the "turkeys"!  They all wanted to go!  Once the turkeys arrived, we took off the "wrapping" and got started!  

There were some interesting designs for SURE!  This group actually defrosted their turkey in 45 minutes.  This equaled an uncookable turkey!  Yep-they better have a different plan! 


This group finished in about two hours.  Out of nowhere their turkey exited the ice!  Yep-uncookable!  


These two groups didn't make it but their turkeys thawed within 15 minutes of "time".  We talked about how they would have a dinner, but they would have unhappy guests because the meal would be late!  


And this teams took an additional hour to thaw!  They would have very unhappy guests, because their turkey would not have been able to be cooked!  


Overall, they had an AWESOME time with this STEM.  We had just finished learning about states of matter and freezing points, so that is all they had to go with scientifically.  Our next unit is energy, including heat energy and insulators.  We will finish right before the Holiday Break!  Guess what we will be trying again!  Yep!  Students completed the  Imagine stage at the end of our STEM.  I am keeping their papers and will give them back with their new found knowledge and give it a go again!  I can't wait to see what they come up with!  


You can grab the Holiday Stem: Thaw a Turkey in my store, The Best Days.  I'd love for you to try it out!  And, feel free to share what kinds of STEM have you tried in your classroom.  I'd love to hear all about it!  Leave a note in the comments and have an AWESOME Thanksgiving!  


February 1, 2017

Welcome to the HOP!

Hello everyone and welcome to the HOP!  I'm so happy to be the first stop on Conversations From The Classroom's very first HOP celebrations!  So, since you are here, I'd like to share a little bit about myself!  


I'm a wife, a mom, and a full time teacher!  I've been teaching for 24 years in the same county.  I have been at two different schools within this system.  I currently teach 3rd grade, but have taught 1st-5th in self-contained classrooms and I spent two years in my schools Science Lab, teaching all grades for one period a day!  That was a great time to really practice those science inquiry skills on a daily basis. 

I also enjoy photography!  One of the greatest times I've had taking pictures had to be when my oldest son and I went on a mission trip to Denver.  We visited The Garden of the Gods and the Olympic Center before heading home.  Here's a few cool pics!  


Without a doubt, that mission trip was one of the most amazing times I've ever had learning about the world around me.  I learned what homelessness really is, how people are still people and loving them is key!  Here's a lovely lady I met.  She is Sioux and she opened my eyes to the truth about Reservation life.  I now long to go to a Reservation to work with people there!  


Teaching is so important to me, and it has opened up my life to so many ideas, thoughts, and emotions as a person.  It also makes my creative juices flow!  So, before I get to me giveaway, here's one more thing about me!  I LOVE to sew!  I learned when I was 14 years old and still love to create my own clothing!  Here's an outfit I made.  I made the shirt last year and the skirt this past summer.  I fell in love with that butterfly fabric!  It encompasses so much about me-color, nature, and fun!  

Now to the GIVEAWAY!!  WHOOT!  I have picked three products to giveaway.  I feel they show off my creative side!  The first two are writing based-one primary and one intermediate!  I have also picked one of my literature based products-Reading Response Pages: Any Book Literacy Pages Exploring Character Development!  Here's how this will work. Simply reply below with YOUR EMAIL and primary OR intermediate in the comment.  You can comment in any additional way you like!  


I will pick three winners from the comments below.  Please note, due to Blogger issue, I can't reply to any comments, so, email is the only way I can contact you!  :)  While your here, be sure to follow me by clicking the Follower button in the bar below or on Blog Lovin' or any of the other Social Media sources!  Winner announced on February 3rd!  (And you can all win because I'm having a sale too!)


Now, HOP on over to our next stop, ZIPPADEE ZAZZ!  Don't stop until you make your way all the way back to my blog!  That way you will know you have completed the HOP!  


September 6, 2016

Why I Wore an MTV T-shirt on a Tuesday!


Hurricane Hermine arrived in Florida on Wednesday, which then spurred the following chain of events, leading to the MTV T-shirt Tuesday!  Here’s how it went down!

On Thursday morning, my brain woke me up at 5:25, my normal time frame.  There was NO WAY I was getting up at that time, especially since we had no school to attend!  I was laying there, doing what teachers do-thinking about school and the things we were learning, when, out of no where, came the answer to a perplexing question that I have asked over and over again, “How do I REALLY get kids to understand the difference between primary and secondary sources?!”  Yes, I was really thinking about that, with a hurricane of rain hit my window.  I promise you, there is something about my brain in the morning that does amazing things!  I’m sure brain research is right!  I’m pretty sure it is because I cycle through the right sleep cycles and my brain has a chance to work on things at night because of it!  Anyways, back to my MTV T-shirt story! 

Once I actually got up, (8:30, just in case you were wondering) I set to work on a truly terrific idea.  The answer to my very question, “How to teach kids about primary and secondary sources?” was swirling around behind me as I sat at the table typing.   Rain, wind, craziness!  And from that, a FREEBIE was born!  The Primary and Secondary Source Project allows kids to see themselves as the very thing they are-a PRIMARY Source! 


Let’s take a look at how I did this with my students.  First, I decided to wear my MTV T-shirt to school.  I bought it because I can honestly say, I was sitting right there, in front of the TV, watching MTV being born!  I’m a PRIMARY SOURCE for that event.  I lived it.  I felt that the T-shirt, in all it’s glory, was a great way to get kids asking questions about why I would wear it, on a Tuesday of all days!  Next, I took the chance of connecting with my parents.  I sent out a quick email about taking a picture of their child or their neighborhood during the storm (looking out a window, etc.) and finding a newspaper article to print.  I also downloaded a number of local articles to have them handy for kids who didn’t get the task done. I found a simple article about MTV’s debut and printed that for my sample.   I also decided it would be fun to wear name badges that let others know that we are Primary Sources.  I purchased Avery printable name badges and made quick “Hello…I’m a PRIMARY SOURCE” tags.  Finally, I printed everything I needed to get the kids started right away on Tuesday morning! 


When the kids arrived, I got them started on their regular routine.  I decided I was going to switch up my schedule and put this activity first.  I wanted them fresh.  I explained to them that with the schedule change came a project about Hurricane Hermine.  I explained my MTV T-shirt and why I wore it.  Then I explained that they, too, were Primary Sources.  They were totally excited.  They wanted to share!  We got to work! 


Everyone had their own experiences and ideas about what took place based on the experience they had at home.  As we worked, we talked about what needed to be facts about the storm, real events that they saw.  We also talked about what could be based on emotions and ideas.  I did this step by step with them through my experience of watching MTV premiere (they were excited to hear that too!) 


The end result was magnificent!  And they get it now, they really get it now!  The best part, most work their “Hello” tags were worn home!   Now that’s a real impact if you can get a student to wear a “Hello” nametag home!   Success!!


So, here it is, in all its glory!  I hope you can use it in a variety of ways.  Just because your students didn’t experience Hermine doesn’t mean there aren’t great things they have witnessed!  Think about the Rio Olympics in itself-Michael Phelps, Usain Bolt, the USA Woman’s Gymnastics’ Team,  Simone  Manuel winning the first Olympic Gold for a black woman in swimming, and so much more outside of the Olympics.  The ideas are endless!  There are two levels of projects, so pick the one that would best work with your students! 

Let me know what your ideas are in the comments below!  I’d love to hear how you would use this in your classroom!  


December 9, 2015

Santa's Force and Motion Workshop!


    Oh my, I thought it would be a hit, but not like this!  My students LOVE this unit!  I mean, LOVE!  The want more and more, and the excitement is right there!  So, let's take a look at what Santa's Force and Motion Workshop is all about!  (If you are joining me as I go along, I will be posting as we complete each lesson!)

     I will tell you, I sent out a Sign-Up Genius to ask for supply donations.  If you are lucky enough to have parents that like to donate, this is the way to go.  Here is what my list was:
                 Mini Marshmallows (3 bags)
                 Sand Paper-Rough Grain (3 pieces)
                 Straws (36)
                 Square Gift Boxes (5 total for my groups)
                 Glass Ornaments (7, just in case!)
                 Ball of String
                 9 oz. Plastic Cups (40)
                 Buffalo Snow/ Batting
                 Tissue Paper
                 Wrapping Paper

Activity #1

The first experiment we conducted is "The Poles Know".  First, use STRING!  I had yarn at first and it did not work well.  The yarn has too much flexibility.  It will allow the magnet to be pulled up to the magnets.  Anyways, I simply tied the yarn STRING to the paperclips and taped the magnets to the ruler. (Next year I will be getting a longer piece of thin wood or even a jazzed up piece of cardboard that allows more space between the books!)  
Once we got started, I showed the kids how the paperclips would dangle down and we discussed gravity.  Just with this discussion they were excited!  Well, then I pulled the first paperclip up-and it didn't work!  We talked about the flexibility in the yarn and we adjusted, but I just couldn't get it to hang freely.  So, I suggested the second.  With a little adjusting, I got it to hang freely!  They were totally amazed!  I was amazed!  I have tried experiments before and they were complete failures.  I know all the variables could cause failure, but we got it!  The other paperclips just stuck!  It didn't matter, the kids totally got the idea!  Then, I explained the science behind it!  It was awesome!  So, I highly recommend this experiment!  I give it an A!  
      But, don't stop there!  This is where I wish I had an Elf on the Shelf!  After school I was able to round up some STRING! OH MY WORD!  

Not only are those paperclips free-flying, but with a good amount of space too!  The looks on their faces this morning!  It would have made an awesome Elf on the Shelf moment!  "Look, I fixed your Science Experiment!"  The best part, the kids still won't let me take the experiment down!  The students that sit there insist on sitting somewhere else so everyone can keep their eye on what is going on!  That elevated this experiment to an A+!  
 (I like how the string is flying free too!)

Check out this video from Instagram!  


Activity #2  Elf Police 4-Wheel Driving Training Course!  


This activity will require you to do some prep work.  You will be creating 3 ramps - one snow, one sand, and one ice!  It was simple.  Just cut longer pieces of cardboard the same length and width.  Then cover the first one in Christmas "snow".  I hot glued it on.  Then I used sand paper to cover the next.  Finally, I used aluminum foil for the last one.  All hot glues. Then, I found two "Santa" looking trucks in my son's car collection! (SHH-Don't tell!)

Next, I set up the book piles and the ramps.  This set the stage.  We read through the information and then went ahead and tested the tracks!  Great fun!  


Afterwards, we talked about how friction is key to distance.  Ice doesn't allow friction to occur and snow is a resistance.  Sand allows traction to occur, making the elf mobiles go farther!  It was a wonderful opportunity to learn!  


Activity #3  Reindeer Games!


Another great name for this was developed by my students-Reindeer Zip Lines!  There are some important things to know about this one!  Be sure to cut the straws small enough for the string to go through quickly.  I cut mine about 2 inches.  Another thing to know is to string the reindeer onto the track BEFORE attaching it to the balloon.  This is just easier!  The kids did blow their balloons up first, and then just taped the reindeer to the balloon!  Let the kids figure out the best techniques for running them.  It didn't take them long to figure out to hold the string as high as they could.   Another thing we did was practice first and, then, run the event as a competition.  This is so much fun and then kids really have a great time playing the Reindeer Games! 


Activity #4 Elf Snowball Throwing School


This is an all-time favorite for my students.  Choose your cups wisely.  Solo cups work, but if students leave a jagged edge, it can cause the balloon to rip easily.  I poke a hole in the cup and let the kids do the rest.  I also fill the ziplock bags with marshmallows for the students to take outside.  Our target-the Villains of Christmas!  The Grinch, Scrooge, and more are on targets for the students to aim at!  Before you know it, they are shooting those "snowballs" and hitting their targets! Check out this video footage!  


Activity #5

The final activity is the Ornament Drop!  It is important to remember that YOU need to open the boxes as the end of the activity!  Hopefully you have a high location at your school to drop them from!  Let the students design the packaging and even wrap the "gift".  Drop the boxes and see who's ornament makes the drop!  Super fun and super easy too!  


Final Evaluation!  

Students then write their letter to Santa.  The idea is to share as much science as they can to impress Santa and you with all they know about force and motion!  

Overall, these activities are just as much fun for me as they are for the students!  And, it is a great way for you to assess Science and bring  Holiday cheer to your classroom!  I'd love to hear how these activities brightened your classroom!  And, while you are checking out these videos, I'd love for you to follow me on Instagram too!