Image Map
Showing posts with label Science. Show all posts

October 24, 2019

Types of Stars-What You Just Might be Missing!

Types of stars is an interesting concept to teach.  While we think students understand the properties of stars, we can quickly build an understanding that each type of star brings a basic struggle for students to understand.  There are a number of reasons why!  Let's take a look at common misconceptions students have!


Color of Stars

The color of stars can confuse students. Think about our own perception of fire.   Fire glows red/orange and is hot, right!  We want to place a label on that-red/orange fire is hot.  Red/orange means hot in all aspects of our life-a stove is red/orange!  HOT-don't touch!  But, in reality, red/orange is cool in the range of heat output.  We just have this preconceived notion that RED means HOT! Stars that are red/orange are the coolest stars.  Blue and white stars are the hottest stars.  Kids are like us.  They want to apply red/orange stars as HOT, but they aren't.  This is a misconception that needs to be addressed when studying stars.  

Size of Stars

Bigger is better, right!  When it comes to types of stars-NOT TRUE!  Big stars a dying stars.  They have burned through their fuel and are heading toward death.  Small stars are fully fueled and are just beginning their lives.  This misconception needs to be addressed when studying stars!  

Distance of Stars

Stars appear on a plain - a flat "surface" to us.  Stars are really at a wide variety of distances from Earth, creating this misconception of a flat, one dimensional surface when we look at them.  And, after all, they are all the same size on that plane, right!  

See the problem of misconceptions building up!  These are REAL problems when teaching types of stars!!!  So, how do we address these misconceptions?   How about a STEM activity!  

Types of Stars STEM project

I developed this STEM to try and undo the misconceptions that I saw my students struggling with-the very ones I just shared with you!  I could not find a way to communicate the properties that we were discussing in a way that students grasped them at a deeper level.  There had to be some kind of hands-on activity out there!  But, there wasn't!  This Star STEM was birthed out of the very cosmos!  It had to make things easier - or so I thought!  

Starting Off Strong


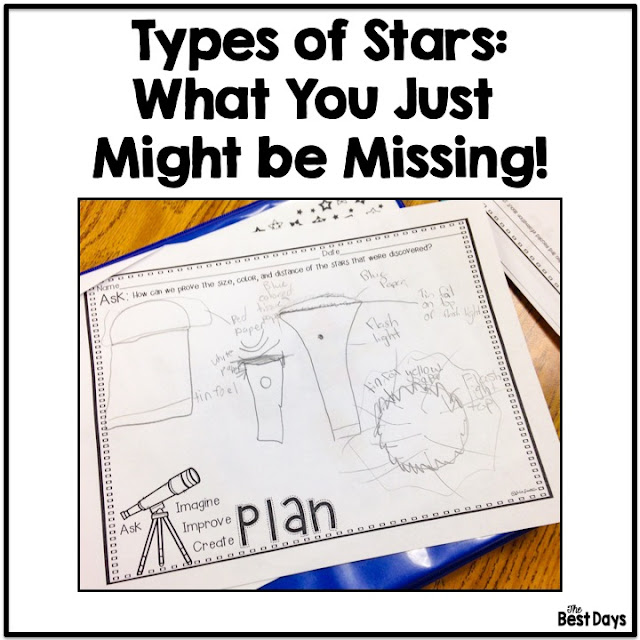
Star STEM planning page


Students were super excited to start this STEM!  They brought a variety of flashlights from home and I purchased some different sized flashlights for cheap at The Dollar Tree and other stores!  You will need flashlights from very small to very large to represent each type!  I also bought tissue paper and some other "star" making materials.  You will need packing tape-a lot of it-too!  Makes sense, right!  

WRONG!  Students jumped on the color first! They where using things like their red pencil boxes with the light shinning through it!  I would say ROUND and it was like I was speaking a different language-because color was key to them!  In fact, one team began creating this blue monster!  I couldn't figure out what in the world they were doing!  They not only missed ROUND, they missed a star is in space!  They were creating EARTH!  So, be sure they truly understand the properties involved.  Even though this was clearly discussed, and redirected to teams, it did not become the focus of what they were doing!  


Students were building the wrong type of star in this STEM picture.
Misconceptions can lead students away from the goal of learning when the 
concept is higher than we realize!


Finishing STRONG!  

We did get every team focused on the correct properties.  We did get every team creating one type of star that represented the size and color that they needed.  It was well worth the effort!  Because, next came testing!  And testing these was where it is AT!  Suddenly, they could SEE what happens in the night sky with distances!  We tested a number of combos of stars and locations in the room.  I had assigned "distances" in the classroom and set up Polaris as the closest star (my design was used for Polaris) on a chair in the front of the room.  As we changed out stars and students in "space" we were amazed to see how star sizes appeared the same and how color didn't matter to differentiate a size.  They blurred into one sky, even within the classroom!  I also used an iPad to take pictures so that we could flip the lights on and examine the evidence in picture form!  


In the end, we did finish strong with our study of types of stars!  We did internalize the idea that viewing them from Earth does not mean that they are all the same distance or the same size!  We did internalize that space has greater distances that can make the size of a star appear smaller than those closer to us! And that is what made this STEM so awesome!  It was the very objective that this lesson was supposed to show-because that one is the most complex of all the objectives in teaching types of stars!  
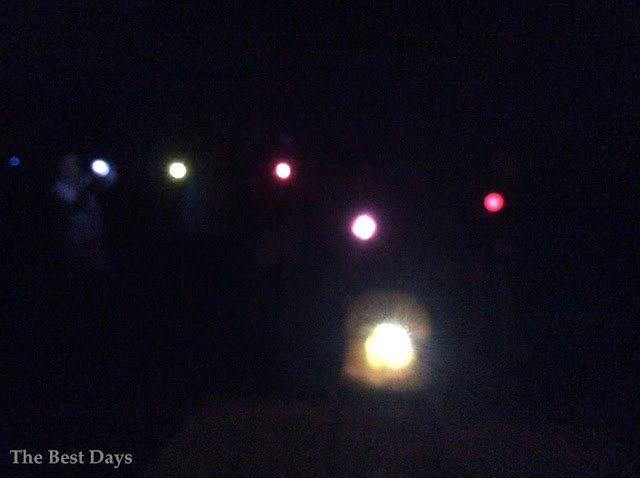

STAR STEM results
These stars are on a plane.  You can see that their size and color are shown.  These are Red Giants and Orange Stars.  

Star STEM testing by students.
Create Polaris to judge brightness and distance, just like real astronomers do!  


As always, let me know what you think!  I'd love to hear what you have done in your classroom with types of stars!  You can add a comment here or join me over at Facebook and Instagram to share your thoughts! I'd love for you to join me there!

(Find out how I hacked this rubric for my teacher observation here!)


Pin for Later


Types of Stars STEM


June 20, 2019

How to Use Project Based Learning to Put on a Parade!

Have you ever wondered how you could easily add a Project Based Learning activity to your classroom?  Are you wondering how to put the project on display?   Sometime it can be merged as one!  Simply put on a Project Based Learning Parade!  


Float Parade Blog Post header


Where to Start?

First, pick a theme!  Every parade has a theme, so a Project Based Parade should have a theme!  Dive into your curriculum to see what could be developed into a project with the outcome as a float-because that's the point of a parade, great floats!  Here are two ideas:  

State Park Floats:  This project explored both the state in general and the region of the US it is found in.  It is primarily to learn about the 50 States.


State Park Float


National Park Floats:  This project explored both the National Park's history and the ecosystems found there.  It incorporated the food chain found in the National Park.  


National Park Project float


You see, both of these have a rich research base.  So, another piece of advice when diving into your curriculum is to look for something with a rich research base.  State flags, maps, park outlines, dates, ecosystems, tourist spots, etc. are all parts of the research base for this kind of project.   What topic are you studying that can allow for this rich base to be met?


Technology Integration

Next, you need to think about how much technology integration do you want?  Students can create research outcomes to accompany the float through the use of technology.  PowerPoints and other documentation can be help students to organize and present the information that they need beyond the actual parade float.  Consider this in your decision making process.

State Project


National Park Project


A post shared by Julie from The Best Days (@thebestdaysclassroom) on


Research Time

Questions about Research Time include how much of a guideline do you want to provide, how much time do students need, and do you want them to complete research in class or at home?  This will also determine your lesson plans and the development of your research questions.  This last point is key to where students go.  Scaffolding them in their research will help them to feel successful throughout the process, whether completed at home or at school! 


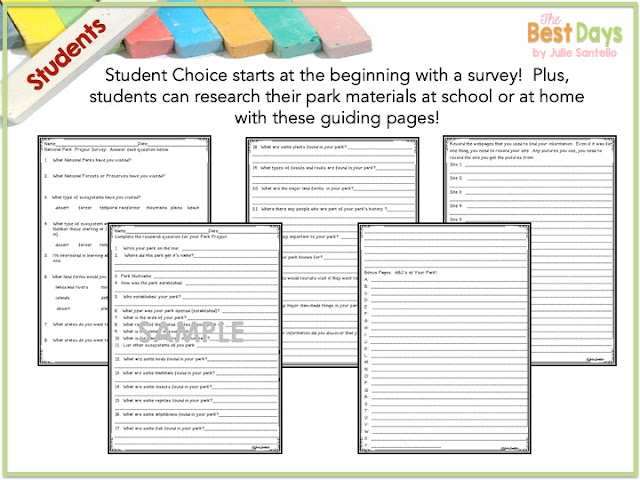
National Park Pages Preview of student work


Presentions

Next, you will want to think about how the presentations in class will be planned and what you will need for them.  Developing a rubric is SO important to this part-and the whole!  Research says that when teachers provide  a rubric, students can succeed at a greater rate.  Plus, it eliminates any negotiation for students who do not complete the task.  So, develop that rubric and get it into students hands!  


National Park Project Teacher pages


Once you are ready to present, have volunteers go first.  Students who are comfortable presenting will boost other's confidence and provide a foundation for others.  I try to pick students I know will offer great presentations so that others see and know what the expectations are.  This will often spur them into practicing more too!


The Parade

Finally, coordinate the parade beforehand!  This means you should send our emails to your staff to let them know the day and time you will be parading!  Students in other classes give the project builders the ooo's and ahh's that just make them feel successful!  Visit as many grade levels and classes as possible!  This means lots of eyes on their projects and a desire to make projects in the future!  That's a key to great project success!  


Once you have engaged in a Project Based Parade you will fall in love and want to do it every year!  Here are two projects to get you going - they provide everything you need for a great project parade!  


State Float Park Parade


National Park Float Parade Project


As always, I'd love to hear from you and what you like to do for Project Based Learning!  Drop a comment below or follow me over at Instagram or Facebook for classroom updates!  

Pin for Later:  


Float Parade Pin


January 2, 2018

STEM Mistakes that I Made


It is important to know that in STEM activities, you can frequently make mistakes that you are not counting on.  Here are some STEM errors that I made that can help you out in your experiences with STEM!  

  Underestimating the Science 

Data from New Year's Noisemaker STEM showing that changing the groupings made less noise than preplanning the groupings.  

HOLY COW!  Can I honestly tell you this was a HUGE error that I made with STEM!  I had no idea when I started that there was way more science hidden in these than the surface level activities that I designed to do.  Suddenly, right in front of me, there was science I did not imagine within these activities.  For instance, when I was creating the New Year's Noisemakers, I obviously hit the science of sound.  However, suddenly, out of nowhere, comes VARIABLES!  I wasn't even thinking about this science at all-and it's actually one of the harder things for kids to see in experiments!  Not in STEM!  We were suddenly creating new groups and discovering new things about groupings of students and their noisemakers!  By doing this, we exposed that by changing the groupings, we flatlined on noise making.  The variable of similar groupings did not produce the sound vibrations that were produced in the differentiation of design that the original groups did!  And that was just the beginning of missed sciences!  So, lesson to learn-be prepared to pick out science features that you can cover with students as they are engineering and while you are testing their products.  It is there-you just have to look!  


Crafting instead of STEM

   
This STEM was fun and had lots of science, BUT it was a little too much for one teacher to handle!

In my Snowman Skiing STEM, I quickly discovered that the crafting overwhelmed the STEM process.  It's not that the snowmen weren't needed-they were!  However, I didn't need to put as much time into creating them as I did.  Next time, I'd get parent volunteers in to help with the entire process if I used hot glue again-or even better, I'd just get the right glue!  Then the kids could do it all!  Make sure you truly examine how much crafting is present because it can get in the way of what you planned for in your STEM.  You want their minds to be focused there, not so much on the craft of it all! 


Providing a Model 


This works both ways.  It is key that you examine the STEM you are working with and decide if a model is a good idea.  For instance, I really thought a basic model in the New Year's Noisemakers would not be needed.  However, I got a lot of similar ideas, many of which ended up being cup shakers and rain stick "style" noisemakers.  When I do this again next year, I will share some "models".  I will simply show them musical instruments during the planning stage as well as the video.  This way, it will broaden their "model" view and allow for more variety.  It is very important to weigh the model idea.  Giving too much information in our model presentation can also guide them too much.  So, be careful-but think it through too! 


Ignoring a Kid Solution

Open space at the bottom allowed the snowmen to ski correctly.

This happened during my Snowman Skiing STEM.  I couldn't figure out how to get those snowmen to ski onto the "snow" surface at the bottom.  They just kept falling over.  However, it never dawned on me until days later, during Winter Break, that the students had already solved this problem-in the pre-testing stage!  Over and over their snowmen simply skied down their slopes.  I literally woke up in the night with the realization that they had a solution to MY problem-that was really THEIR problem to solve-IF I HAD JUST ASKED!  I need to be asking students during the testing stage rather than dictating the things we are doing.  A deep thought to ponder!   


My plan caused the snowmen to fall over!  

Not Providing Time to Reflect


I had ever intention of reflecting on my STEMS.  I even built this into my products.  But intentions are not always matched.  You see, it was before break...yadah, yadah, yadah...  Why did I even listen to my own excuses!  This is so vital to their growth in this system, and yet, I talked myself out of it!  Reflecting allows students, just like us, the adults, to grow.  However, it comes natural to us.  Not so much for them!  I skipped this vital opportunity for students to grow and change.  So, I hear by pledge unto myself that I won't do this again!  Let them have that time!  It's key!  

I hope this will help guide you in not making the mistakes I have made so far.  I will say, it truly is an amazing process to engage in within your classroom setting.  There is usually little set-up and take down. Plus, the kids are so involved in it that they will think of things you never have and create things you've never imagined within these activities in your classroom!  I am currently awaiting the arrival of this book:


(Affiliate Link http://amzn.to/2C8Oknl )

I'm super excited to see what's inside.  Once I get going, I'll post a good review!  I'd love to hear what mistakes you have made of what books you use for STEM!  Drop me a comment to let me know!  


Pin for Later    


December 20, 2017

New Year's STEM: Exploring SOUND Energy!


Happy New Year everyone, even if it is a little early!  Or, you may be joining me for a look at this STEM based off a duplicate product found in my store!  Either way, be prepared for some FUN with STEM and Sound Energy! 

In this STEM you will find the following steps:  Ask, Imagine, Plan, Create, and Improve.  I have also included a chance to Reflect on this STEM though a quote provided to inspire deeper thinking about this activity.  It is important to know that while STEMS come with a variety of step models, each of these models cover the same principles within STEM.  The key is that students apply the principals of creativity and engineering.  Students should be developing systems and ideas based on what they see as the best form of applying their personal skills and the concept presented to them in the challenge at hand.  That means you are as hands off as possible.  The only thing I really did in this STEM was to manage supplies, cut the duct tape (because it is REALLY sticky), mark the results, and vacuum after the clean-up (More on how to avoid this from my lesson learned to come!)  So, here we go!

First, students were able to apply their understanding of sound energy from their schema from our lessons in class and from the video suggested in the product found here.  This is the ASK stage!


In the product, you will find an open note taking page and a guided notes page.  With my third graders I use the guided page.  I also let them watch the video once through without taking any notes.  Then, I stopped it at spots so they could write down what they learned because she talks REALLY fast!  You could always swap out this video with another, as the Powerpoint allows you to embed any video you choose (directions are included).

Once my students worked through the ASK stage, they moved to Imagine.  This is where students had to think about the Criteria and Constraints involved in this activity.  In other words, what the could and could not do.  These are established to keep students within a boundary so that they are not getting off task and wasting time going down bunny trails or even socializing.  In this STEM, one of the Criteria is that they must have different designs for each team member's noisemakers.  This was key, as one team got off target because, during create, they decided they liked another noisemaker better.  They all wanted it and headed down that bunny trail.  I was able to redirect back to the criteria to get those students back on their PLAN!


Yes, that's the next step, PLAN!  In Imagine, students are simply brainstorming all of the possibilities that they have.  This PLANning stage allows them to square up the actual plan they have.  In this case, this is where students developed a specific system to make noise and decided on what supplies they needed.  I supplied them with beans, rice, cereal, duct tape (needed but STICKY), paper towel rolls, gift wrap rolls (A parent brought them in!), paper plates, jingle bells, fabric, embroidery hoops, cups, tongue depressors, staplers, regular tape, and glue.  Then I opened my classroom cabinets to them with the understanding that it couldn't be anything that I needed back from them!  Many of these things were already in my room.  I did utilize parents for some of the things that needed to be purchased (beans, rice, cereal, jingle bells).  I gave them a good amount of time to plan.  They did a very good job of planning and knew what they needed when we moved onto CREATE!


CREATE is the time that they will actually BUILD their noisemaker.  I provide a half hour for this step.  This seems to be a fair amount of time for all groups to be able to be ready, based on the STEMS that I have completed so far.  This did not include the time I used to pass out supplies.  I did this pre-CREATE.  I had student team members come to a table area and pick up supplies such as the rice, beans, and cereal.  This is where I didn't think!  Before they started CREATE,  I should have laid down large pieces of bulletin board paper.  We had a little bit of a mess from kids not knowing how to pour the materials.  I was able to show them how to make paper funnels after I discovered that pouring didn't work so well.  I would definitely suggest this for your classroom before you begin!  I haven't vacuumed in years, as we have wood floors at home and I sweep!  It was an experience for sure!  Anyways, students went fully into CREATE mode and were able to complete this step within the half hour provided!

STEM, Noisemakers, Student-Led Learning 

Now it was time to test their systems!  Included in the product is a fun slide in the Powerpoint just for this!  It includes a website specifically designed for detecting sound levels in the classroom with a fun graphic-Bouncy Balls!  I used this and set the bouncy balls on the lowest amount available.  Then I explained we would use the large bouncy balls, as these are the hardest to move!  I also explained to students that they were not to make ANY noise with their voices (unless they made a horn type of noisemaker) because 1.  they could be helping another team win or 2.  they would be getting a false read on their noisemakers.  Then I stood at the board and marked the three highest bouncy balls that each team achieved!  This is how we judged the assigned group winners!


What we did next was even more fun, and this is also where we got into some serious science application!  I allowed kids to group randomly and we tried it again!  And we got totally weird results.  Weird in the fact that we were able to see how variables affect an experiment.  When students were randomly grouped, meaning they were with similar equipment made by other students, our data flatlined!  They were not able to create sound higher than the original groups of differently designed noise makers.  More importantly, they got a hands-on experience with variables!  I love that we could apply that science term and skill in this very minute!  Real life application!


Next, we headed to IMPROVE!  Students were able to look at all the different noisemakers and discuss and plan for even better noisemakers.  Also included in this was an opportunity to reflect.  IMPROVE doesn't always have to be about the STEM.  It should also be about how they could be better as students-with each other and within creating and growing.  Right now I'm getting a lot of "we worked good as a team" instead of those deeper reflections as a cooperative group.  That is going to be one of my goals as we get more and more into learning about how we work together in STEM and how this connects to us working as a team in other areas of our classroom.

I'm totally excited to add STEM to my growing knowledge of the Student-Led Classroom.  I can honestly say, I can see this being key in the development of how students lead in a classroom setting.  If you'd like to learn more about Student-Led Classrooms, jump over to my general post called Just the Place to Start.   Are you interested in checking out my growing STEM products?  Check them out over at my store, The Best Days!

More importantly, thanks for stopping by.  I'm super excited you did and would love to hear any feedback you have about STEM or this idea, in general.  I'm still learning and would love ideas, suggestions, and even improvement ideas you may have!


November 21, 2017

Gobbling up Some STEM Experiences!


One way to enjoy a holiday is through STEM activities.  I am just venturing into STEM and it seems like a perfect fit for Student-Led Learning.  While I was thinking about what to do with the two days before Thanksgiving, STEM came to mind!  Why not?!  The students' brains would not be able to do much, they would loose whatever learning we were doing over the long weekend, and, well, I would be just to tired to teach-period!  Also, I have viewed STEM as a fun adventure-up until creating and implementing one!  

I knew I wanted to think of my very own idea!  The way I learn how to create something new is by developing something from start to finish.  I have always been this way.  It allows my brain to cycle through a cycle.  I know that's a lot of cycles, but that is truly what it does.  Suddenly, the Turkey Hotline popped into my head and that's where I went-turkey thawing!  Yep, but HOW?!  How do I implement such a crazy thing for kids!  

Here's how it went down!  First, I shared the basic concept with my students. I designed the pages in the Holiday STEM:  Thaw a Turkey to be both printable pages and a PowerPoint presentation. 


Then they dove into the process.  I designed this with the idea that they would complete the activity in two days.  The first day, students worked through the Ask, Imagine, Plan, and Create stages.  This took very little time actually.  In less than an hour students had worked through these stages and created their thawing devices.  Here they are! 


So, where were the "turkeys"?  My school has a freezer in the office.  Once I got permission, I started the freezing process there.  Then, the second morning, I sent students to the "grocery store" to pick up the "turkeys"!  They all wanted to go!  Once the turkeys arrived, we took off the "wrapping" and got started!  

There were some interesting designs for SURE!  This group actually defrosted their turkey in 45 minutes.  This equaled an uncookable turkey!  Yep-they better have a different plan! 


This group finished in about two hours.  Out of nowhere their turkey exited the ice!  Yep-uncookable!  


These two groups didn't make it but their turkeys thawed within 15 minutes of "time".  We talked about how they would have a dinner, but they would have unhappy guests because the meal would be late!  


And this teams took an additional hour to thaw!  They would have very unhappy guests, because their turkey would not have been able to be cooked!  


Overall, they had an AWESOME time with this STEM.  We had just finished learning about states of matter and freezing points, so that is all they had to go with scientifically.  Our next unit is energy, including heat energy and insulators.  We will finish right before the Holiday Break!  Guess what we will be trying again!  Yep!  Students completed the  Imagine stage at the end of our STEM.  I am keeping their papers and will give them back with their new found knowledge and give it a go again!  I can't wait to see what they come up with!  


You can grab the Holiday Stem: Thaw a Turkey in my store, The Best Days.  I'd love for you to try it out!  And, feel free to share what kinds of STEM have you tried in your classroom.  I'd love to hear all about it!  Leave a note in the comments and have an AWESOME Thanksgiving!  


July 6, 2017

Student-Led Learning: Failure IS an Option!


Interesting, isn't it?  To think of failure as an option-because, as Sutton and Westberry point out, it IS going to happen!  Welcome to Step 5-Failure!  

As I shared last time, I did try a similar ideas many moons ago. What I can't remember are the failures.  Honestly, I can tell you the how I did it, I can tell you the why I did it, I can even tell you about the specific moment I realized that remediation was instant!  A very bright young man came up to me with his paper.  Students were allowed (and still are in my room-and in Sutton and Westberry's class) to self-check papers.  I pull my pages out of the teacher's student edition and I create a key.  Students go to the assigned area and check their work with an approved grading tool (a red or blue grading instrument-instrument so no one asks if a colored pencil is ok, a crayon is ok, etc.).  There can be no more than 3 kids at the paper at once.  I label the word problems they do with Mrs. Santello so I check those for accuracy and understanding.  This is the system I've used now for all these years-whether I've taught whole group or small group, it was something I never gave up! Anyways, back to young man...

This fine young man came up to me and had many incorrect problems.  We stood together while I checked his work very quickly to see how he mismanaged the algorithm.  I discovered the problem, quickly showed him again right there, and sent him on his way to redo.  In that moment I got it! I didn't have to create some extra grouping the next day!  I didn't have to do an additional reteach page!  All he had to do was have feedback right away!  And he got it!  He was able to prove it on a number of problems I gave him.  This moment has stuck with me for about 14 years now!  This is the power of the model!  

So, how does this show failure-it took me a few good months to figure out that whole system I just told you about, just as it did for Sutton and Westberry!  Their many failures led to successes FOR THEM!  They are clear to point out that there is no perfect model, just the cycle of trying something and failure within it to try again!  This is a chance for us, as adults, to model perseverance for our students!  They do give a few good tips along the way, too, so that you don't make some major snafus they did!  One HUGE point-be preplanned a few units ahead if you are targeting math, just in case!  But, again, they consistently point out the fact that you must never give up because our students deserve better!  

Are you ready to take the plunge?  I totally am!  I'm super excited and I've preplanned a number of my math units!  It just so happens that my district rearranged our Science this year, so I'm ahead of the game there too!  Here are some of the products I will be using to get the Student-Led Learning model going in Science!  These are fun to use and, theScientist Craftivity will allow students their first taste of becoming a leader in learning in the Science block!  


Read the post HERE


Again, I think the key takeaway from this chapter is to expect failure and model perseverance!  What a great way to be a role model for the very students we want to embrace and grow in our classroom!  I'd love to hear what you have to share or your experiences along the way!  Be sure to share them in the comments to help us all grow and learn together! 


June 19, 2017

Chew on This: Student Inquiry with Dr. Larry Chew


Bonus round has begun!!  As I have shared, I'm on a quest to discover more and more about student-led Learning!  Today was an excellent discovery and it was FREE!  Awhile back my district had sign-ups for a free summer institute in science!  I jumped right in and I was accepted for the class!  Little did I know it would align perfectly with my goals for the year and that I would get to hear a great speaker too-Dr. Larry Chew!  

Dr. Chew's background was an aerospace professor who now presents nation wide!  How does an aerospace professor go from teaching college students complex engineering principles to reaching the hearts of teachers-it started with fear!  Fear that he was unable to prepare his own children for real life.  He was a great professor who's tests scores just didn't line up to prove that.  Instead of staying at "Oh well!" he went on the path to discover why!  Through this, he discovered that background knowledge and exploration were missing in his classroom!  So, he worked to develop an answer, and discovered inquiry based discussions that put the student in the role of discussion guider and questioner!  

This method is brilliant!  Purely brilliant!  It builds both background knowledge through exploration and student based discussions, allowing students to figure it out!  Let's face it, he's right when he shares that 2/3 of the student in our classrooms can't tell us the why.  But the reality is, no one is out there teaching us how to get them to be able to do it!  Chew points to the fact that it is up to us, the teachers, to get out of the way and allow the kids to do it, with a carefully planned classroom environment and the training needed to ask the questions themselves.  And, it's super easy!

I say "super easy" right now.  He explains that it will take lots of time and practice, and MANIPULATION!  That's right, he says that we must become master manipulators-to teach students how to go in the right direction with questioning and how to get them to "discover" the answer for themselves.  So, let's dive in!

First, it starts with the benchmarks.  If you don't know the benchmarks, you are dead in the water!  Plus, you do have to know the science or concept you are going to present.  He can, literally, in minutes provide a basic lesson idea.  He did it, multiple times, with multiple subjects!  From the benchmark, you develop a content statement-the thing kids are to take away, to remember, to LEARN from the whole lesson!  Next, find a quick activity that will take all of 5-7 minutes of time!  And, you are ready!  

Next, you present your students with the benchmark or whatever else you are required to do in less than 5 minutes.  DO NOT share the content statement!  Complete the activity and, then, have them write on a whiteboard (one per table in teams of 3) whatever your learning goal might bring.  The experiment we did is we wrote words to describe what we saw in the experiment.  Then he asked us to divide them into two columns.  Easy right.  What we DIDN'T see is Dr. Chew checking white boards for a key word-physical!  This is where the manipulation on the teacher's part is taking place. He is targeting 2 or 3 table groups (never students-tables!) to call on who have the right words and ideas as the start of the conversation!  And, what a conversation!  

Here's how it works! The process is called Add, Ask, and Challenge/Comment!  Dr. Chew modeled this over and over.  He asks the first question and chooses one of those 2-3 students who had the right concept, your concept statement goal, on their white board!  Simple right.  Here's where it gets good!  Dr. Chew then only calls on student names.  The student called on MUST ask a question of the TABLE (once someone talks, it goes to the next table member).  Once that is answered, the next student called on MUST CHALLENGE or  COMMENT  on what was said.  And it keeps going like this.  If a table doesn't know, it is up to the tables around them to help out and keep the conversation going.  You do this for about 10 minutes, without teacher input.  You can plant questions and you can thank someone who is misdirecting a comment, but you don't fix anything, even misconceptions.  But you listen carefully and take note of what you do need to fix when time is up!  Yep, and it is all kid based. Sounds too easy right!  Even Dr. Chew says we are working to hard at that perfect classroom.  If it messes up, refocus and try again.  If a table isn't involved, maybe tomorrow they will be!  It just takes time and practice!  

So, what happens when it is over?  Then it is teaching time. You present what you need to present, fix misconceptions, and focus them completely on the content statement!  You have manipulated them into believing they figured it out on their own!  BRILLIANT!  

There is also the closing activities-practice the content statement 3 times silently and then tell your team member-each taking a turn!  And that's IT!  Simple, easy, and BRILLIANT!  Check out more over at TommyC.org, Dr. Chew's homepage!  Be sure to check out the handouts and more!  

Personally, I can't wait to try out this method in my classroom.  It allows students more control, it allows me to teach with the students in mind, it provides more hands on in Science (but it can be used in any subject), and fit perfectly with my philosophy and where I'm headed!  

Let me know what you think in the comments section!  Can't wait to hear what you have to say!