Image Map
Showing posts with label Challenges. Show all posts

June 6, 2019

Why Contraction Surgery Succeeds!

Contraction Surgery is such a simple, yet wonderful, way for your students to succeed at learning contractions!  Often we think and believe that contractions are an easy skill for students to learn and understand.  When we apply a project to this skill, it becomes a delicate art of skill and knowledge hidden in the fun of Contraction Surgery


Student engaged in Contraction Surgery.


My interest in Contraction Surgery started years ago when I saw a simple pin online, even before Pinterest was a hot spot for ideas.  Just the picture alone got my mind spinning!  I was teaching first grade at the time and thought, "I'm going to do this!"  I created this product, and headed on my merry way!  And it was FUN!  

After being away from Primary teaching for a few years, I have returned to Second Grade with the promise in my heart to complete Contraction Surgery again, and really dive into discovering why it is such a success!  


Why is it a Success?

Contraction Surgery wraps two things together that make it a success.  These two things are hands-on learning and FUN!  Yes, I said it, FUN!  Imagine that in today's learning environment!!  So, let's start there!


Students are engaged in Contraction Surgery

FUN!

Contraction Surgery is FUN if you make it so!  You don't have to create a total classroom transformation for this to happen.  I did something simpler.  I added some blue Dollar Tree table cloths to the ceiling for a "operating room" feel, bought some masks and gloves from Walmart, and, with the help of another teacher on my team who participated with this in her room, gave students hospital gear to wear!  (Donations from doctors offices and emergency rooms can help you gather these things too!) 


This classroom is set up for Contraction Surgery!


I dressed in a super cheap scrub from Walmart! Our Dr. Apostrophe decorated our board and welcomed our "Contractionologists" into the surgery suite!  
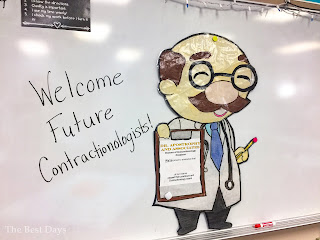

Contraction Surgery Dr. Apostrophe welcomed students to their surgery day!

 I also hit the bulletin board paper room for the "surgery table" covers.  I also rolled out a long piece of paper on the floor for our "patients" to "recover" on.  All this set the stage to engage and get the kids ready for FUN!  These steps are so simple too, so don't skip over these fun little extras!  


Student table is set up for Contraction Surgery

Hands-On Learning!  

Don't underestimate the lack of understanding students may have with contractions!  Contraction Surgery provides the opportunity for students to manipulate the word cards in a way that goes to their higher-order thinking. They must analyze the word and work to create the new contraction.  Many times we take it for granted that students just "know" the two words, because we use contractions all the time in our conversations.  But, in reality, this activity makes them deconstruct their knowledge of contractions and work in a backwards thinking process.  I "know" contractions, but now I have to apply my knowledge to the process in front of me-much more difficult than we can imagine.  To scaffold this instruction, I allowed my students to access a contraction list and to "consult" with one another!  


Students enjoy helping each other with their Contraction Surgery work!


I also allowed students to perform "emergency measures" on words that were incorrectly formed.  This meant that other students could pick up "dying" patients from the recovery room and fix the contractions they found were errors.  We saved these to be talked about later!  

So, as you can see, although we think contractions are easy for students to apply and learn, it, in many ways, is an opposite situation!  By creating a fun, safe environment through Contraction Surgery we can allow them to practice the process in a way that is both memorable and fun!  


Contraction surgery was a BLAST! I had completely forgotten how amazing it was! It was engaging, rigorous, and fun all in one! And guys, we are making assumptions about what kids know about contractions! I had most of my class needing to access our Kindles and Enchanted Learnings list to feel successful at this! They learned a lot and had a great time doing it! Product link in the bio!! Honestly an amazing process and so worth the time!! • • • #secondgradeteacher #secondgrade #secondgradefollowloop #secondgradetribe #secondgradeteachers #secondgradefun #secondgradesquad #secondgradeshenanigans #2ndgradeteacher #2ndgraderocks #2ndgradeclassroom #2ndgradeswag #2ndgradefun #iteachsecond #iteach2ndgrade #iteachsecondgrade #iteach2nd #classroomtransformation #teachersfollowingteachers #contractionsurgery #teachingcontractions
A post shared by Julie from The Best Days (@thebestdaysclassroom) on

And, what's even better is that it doesn't have to stop there!  You can provide additional practice with contractions in this product!  In addition to getting everything you need to make your Contraction Surgery a success, you get additional practice pieces!  


Click to find Contraction Surgery in my TpT Store!


AND, so fun items to make a great page in a school memory book or just to take home to hang on the fridge!  

I'd love to hear your thoughts on Contraction Surgery, so drop a comment below!  Also, to check out all the things going on in my classroom, I'd love for you to follow me over at Instagram or Facebook too!  


Pin for later!  


Contraction Surgery set up!


February 12, 2019

Book Clubs for Kids: 5 Tips for Grading Student Book Clubs

Book Clubs for Kids is one of the BEST ways to use real literature to build comprehension in students. Student choice and student jobs, or roles, are key components to success in Book Clubs.  But there is the question that teachers who want to start Book Clubs ask the most-How do I grade Book Clubs for kids?  Let's take a Look at some tips to grading Book Clubs!


Tip #1:  Use a Well Developed Rubric to Grade


Honestly, this is the BEST way to grade.  I spent years examining what my students were doing in Book Clubs for kids to adapt and change to meet their needs.  Once I created an area, I would try it out and see how it worked for a diverse number of students.  It was adapted and changed over and over again until I found the perfect combination of social interactions and academics.  I used this grading rubric with groups I sat through and groups I observed as I walked around.  It is a life-saver when it comes to scoring students.  
Rubrics for grading are one easy way to get a grade from Book Clubs for kids.


Tip #2:  Grade their Meetings


Document everything!  It is key to keep track of what was said in Book Clubs beyond what the students provide.  When I first start Book Clubs for kids, I sit in on their meetings.  I also ask Higher-Order Thinking Questions. I take the time to write down what each child is saying.  What do I do with this?  I keep the papers so that I can tract their progress over the year.  I also examine these pages for strengths and weaknesses in students and to readjust groupings.  This also leads me to lessons I can teach to build our Book Club skills.  


Tip #3:  Grade their Book Club Jobs


In addition to using the rubric, I also grade the Book Club for kids jobs.  This is where I gain valuable grades, as you can either grade these separately or all together, depending on the level of skill your students have.  In the primary grades, I grade them as one grade.  In intermediate, I tend to grade these as stand-alone grades because of the amount of work it takes to prepare them.  You can also apply point values to each job and, then, add those up as one score in the end.  There are plenty of variations along the way to play with.  Try some out and pick what works best for you!  This is key!  


Tip #4:  Grade for Specific Skills


Book Clubs for kids can also be adapted for specific skills.  On top of the Book Club jobs, you can add open ended pages to the Book Club to target a specific skill you want to assess.  Be thoughtful about the amount of extra work though.   You don't want to add too much to their plate, as reading and completing the main tasks can fill a student's time.  


Tip #5: Grade with Expectations


Sometime teachers look at Book Clubs for kids as "fun work".  It is important to grade with the same expectations you would on any class assignment.  This is NOT "fun work".  Yes, kids have fun in Book Clubs, but their work should be taken as seriously as any classwork is.  Look at content, conventions, and anything else you would normally look for in student work.  This can take their work level to the next realm of learning!  Expect and they shall achieve!  

Need a great rubric for Book Clubs for kids?  Check out my two levels of Differentiated Book Clubs!  They have a variety of assessment pieces built in for you to use!  I'd also love to hear about your tips for assessing kids in Book Clubs!  Drop a comment and share your ideas!  Or, ask a question!  I'd love to hear them!  


Other Book club for Kids Posts to Read: 

Why I Don't Do Guided Reading:  Book Clubs Exposed

Student Choice in Book Clubs

The Secret of Getting the Best out of Student Jobs

5 Things You Should Look for During Book Clubs


Pin for Later:


5 great tips for Book Club grading in your elementary classroom.


February 5, 2019

Book Clubs for Kids: 5 Things You Should Look For During Book Clubs

As teachers, we are constantly looking at our teaching and evaluating what we are doing.  With Book Club for Kids, we are doing the same things.  It is very important to "read" what is going on in the groups and responding to what we "read".  Here are 5 Things You Should Look for During Book Clubs!  


1.  Behavior Concerns


Yes, this is the number one thing you need to watch for!  Kids are kids, and they will try to take advantage of this!  Stand firm, monitor this group more closely.  Use proximity.  You can also pull students away as a consequence.  Students love Book Clubs but if their behavior gets in the way, they need to be removed.  Watch also for the opposite-using behavior to get out of Book Clubs.  Students who don't finish work don't participate.  Students are quick to figure this out and will try and use it to their advantage.  Be one step ahead and have a plan.  I usually provide additional class time to that student-especially if you have centers or "free time" that can be used.  It won't take them long to see their theory of less work doesn't work.  Always be on the look-out for behavior!  


2.  Struggling Students


Struggling doesn't always mean that just the low students struggle.  Struggling can come in many forms.  The idea that it is just the reading who causes a student to struggle is not true in Book Clubs for Kids.  The work itself can be a struggle.  Coming up with questions for a student who has not mastered questioning in reading is a struggle.  Creating a summary can cause a high student a lot of stress if they have not practice creating a summary.  Some kids can't make a strong connection because they lack some emotional skills to do so.  This is when you can differentiate your student's tasks.  Watch for what they need, instead of what you need.  Providing the perfect balance can lead to success for all your students!  


3.  Weaknesses of the Class


Weaknesses of the class in Book Club for Kids is key to watch for.  This can give you an overview of what concepts and ideas your students are lacking.  Teaching a skill in isolation and expecting them to apply it in Book Club can be a surprise when they fail at being able to do it.  Isolation is just that-students are looking for that skill and they do it for the grade, just like spelling tests or other rote skills.  Then when they are confronted with something in Book Clubs we are shocked when they fail at it.  WHY?  It is now in context.  Book Clubs are the perfect opportunity to see what your class really knows and make a plan to correct their path, whether it be the whole class or small groups of kids.  Watch for the weaknesses, they are there!  


4.  Lessons to Teach


It never fails that I have to teach two core lessons when we get started, no matter what grade level I teach.  The first one is how to write a summary!  Summaries are key to Book Club with Kids.  Summaries are also key to classroom experiences and State Testing skills.  Yet, kids are always weak at it because we teach it in isolation!  And, what do we hear over and over - your kids can't summarize.  With Book Club, it is a required element that makes them practice in context, again making the skill come alive!  So, take the time to teach it as you want to see it.  This could be done pre-Book Club or even during Book Club.  

Another weakness in students, no matter what grade I've taught, is good, quality questioning.  Students will start out looking for knowledge level questions, including yes/no answer questions.  Make it clear from the beginning that these questions are NOT acceptable.  Work in lessons on how to build stronger questions for your Book Club discussions.  Tie in Author's Purpose as a way to challenge students to ask other students questions.  Even better, build in questions stems through Anchor Charts that students can access over and over again.  Don't give up.  This skill takes time and with your constant help, students will be developing "teacher quality" questions.  Trust me, I have a whole notebook full of questions I've made enhanced with questions students have asked to match my ever growing collection of Book Club books!  

So, what are you looking for to discover lessons-the first place to look is at #2- weaknesses.  What continues to be your class' weakness?  The second place to look is your Standards, whether it is Common Core or specific State Standards.  Search to discover what your students need.  You will not be disappointed!  


Book Club for Kids Author's Point of View

This is an example of how you can take a Standard and 
turn it into a Book Club!  


5.  Enjoyment!  


This is a key component of Book Clubs for Kids.  If they are not enjoying it, they are probably not learning.  There are always books that students won't enjoy.  It is key to keep this in mind as you select books.  Just because you enjoy may not mean that they do. Be responsive to student need even before you start.  Then, monitor for this.  There are times you may just need to abandon a book, just like real readers do.  This needs to be an open discussion among your group and be agreed upon by all, so that they hear they are valued and respected.  In general though, students enjoy this process and want to engage in this process.  Always be watching for their level of enjoyment though, just to be sure.  


How do you accomplish all this?  In a carefully crafted way!  Differentiation is the very best way to meet all students needs and you can find that in these Book Club for Kids products!  Grab what you need by clicking on the picture below!  


Book Club for kids differentiated book clubs

Differentiated book clubs for kids grades 3, 4, and 5


I'd love to hear what you think!  Leave me a comment and let me know what works for you or what you are still wondering about  Book Clubs for Kids!  Or, join me on Facebook or Instagram to follow my journey, including what I do with Book Clubs!  

Pin for Later


Teachers should know what to look for during Book Clubs for Kids- Learn about what to watch out for

Read More in this Series of Blog Posts


July 18, 2018

How to Hack the Dreaded Teacher Observation Rubric to Save You Time

Teacher teaching class with girl smiling because she helped the teacher Hack the Dreaded Teacher Observation Rubric

Each year as teacher observations come around, everyone starts to panic!  One of the panics include:


"How in the WORLD am I going to get my student created rubric done for the lesson they are going to see!"

Yep!  Every. Single. Time!!  After my first year of getting "dinged" I realized that it can't just be for this observation, this moment. What are we really doing in our classrooms that things like this are only good enough for observation moments?  Do we not realize YET that kids aren't going to play into that kind of thing and that administrators (or, at least, let's hope) get that the kids have no idea what they are using that rubric for!  The fact is, every classroom should be creating rubrics with students and for students! But, we struggle with allowing them to create, to impact their learning and, in all of this, make our rubric rock for our observations!  I think I have found the PERFECT Teacher Observation Rubric Hack!  


How to Hack your Teacher Observation Rubric


First, determine what your end results for your observation needs to be.  This is what they students will be learning in the lesson that you are going to be teaching.  You want this to be fresh and new-nothing they have totally mastered.  If they have some ideas, that's ok.  My admin looked at my finished rubric and specifically asked if the students gave those outcomes.  I was able to say no!  That was a good thing.  My admin said that if they were able to give the outcomes in 4 levels, there was zero reason to do the lesson!  So, keep that little tidbit in mind as you are planning your observation!  

Next, create an anchor chart with the titles.  I simply headed it STEM and added a column for "Behaviors" and one for "Scientific Knowledge."  Your second column will be your curriculum focus.  You can even change your behaviors column to something like, "Grammar Elements" or "Center Work"-anything you need for your lesson!  Get creative!  


A  boy working on adding his post-it note to the Teacher Observation Rubric Hack chart in class.

Now comes the magic!  Gather your students to your carpet or meeting spot!  Explain that your administration will be coming into your classroom to record the story of your class.  I take this route because our administration talks to the students and writes things down.  This totally scared my kids the first time they did this because they have little to no contact with administration.  By explaining that they are writing a narrative piece, they are ok when they see their names being written down on the paper or computer they are using.  I tell them to be open to the story and to add whatever they can to make our classroom story be the best!  Next, I  introduced the chart.  My students knew that we would be observed and what we would be doing.  I shared this again with them and then asked them to think of other times we have worked through an activity like this!  We worked first on the behavior side.  I had them turn and talk about what behaviors they felt were key to this activity.  Then, here's the magic, I had them record information for behaviors with the idea that 4 was the best work and 1 was the lowest performing behaviors.  They could write to whatever they felt they know the most about!  All it take is one student's ideas to make this work, so don't stress that they are all perfect statements!  
Now, do this again with "general" knowledge of your topic.  Remember, you are not looking for them to nail it!  You want them to be general so you can adapt it, etc. to your needs!  You get to nail it!  
These are post-it note examples of how the students replied to the questions on the chart for the Teacher Observation Hack Rubric.


Whats Next?

Now, pull that chart off just as it is, take it home or someplace quiet, and get to work!  Here's what you do!  
1.  Set up a table in PowerPoint or some other document that will allow you to create the rubric.  You could also create it on another sheet of paper for display.
2.  Look for great quotes from students that you can adapt to the positive just enough to make your rubric work! 
3.  Look for levels of learning expectations (See the level 1 in that pic!)  
4. Create the teacher observation rubric from the students' statements and ADD THEIR NAME where their statement connects on the rubric!  Yep, nothing causes ownership like their names on a rubric!  
5.  You add the content specifics and add names only where needed.  Notice on mine, it is only at Level 1 because they actually targeted their struggles in this statement.  That came out during my observation!  


This is a rectangular page that shows the rubric information with students' names added to Hack my Teacher Observation Rubric.


Easy-peasy!  And, you have a beautifully designed teacher observation rubric with student-led learning wrapped inside!  This took me considerably less time than the rubric I made the year before.  That one took me DAYS of class time, because we had to do it in small doses!  This one was quick and easy!  Students loved their names on it and many were impressed that they even had the thoughts they did!  The only thing we did in addition to these steps was to share the actual content of the rubric the day before the observation.  Students also had a copy in their STEM folders and I was able to refer to it and remind them of their scoring criteria throughout the observation!  All in 1/2 the time of the previous rubric development in my classroom!  

How about you?  Have you developed an easy way to create a student-led observation rubric?  If so, I'd love to hear all about it!  Drop a comment and let us know!  


The product I used for my observation is available in my TpT Store!  
This is the Star STEM link to TpT I used during my observation and to hack my Teacher Observation Rubric

Want to read more about my ideas on the Teacher Observation System?  Check out this post!  

Pin for Later:  


Teacher teaching class with girl smiling because she helped the teacher Hack the Dreaded Teacher Observation Rubric


January 2, 2018

STEM Mistakes that I Made


It is important to know that in STEM activities, you can frequently make mistakes that you are not counting on.  Here are some STEM errors that I made that can help you out in your experiences with STEM!  

  Underestimating the Science 

Data from New Year's Noisemaker STEM showing that changing the groupings made less noise than preplanning the groupings.  

HOLY COW!  Can I honestly tell you this was a HUGE error that I made with STEM!  I had no idea when I started that there was way more science hidden in these than the surface level activities that I designed to do.  Suddenly, right in front of me, there was science I did not imagine within these activities.  For instance, when I was creating the New Year's Noisemakers, I obviously hit the science of sound.  However, suddenly, out of nowhere, comes VARIABLES!  I wasn't even thinking about this science at all-and it's actually one of the harder things for kids to see in experiments!  Not in STEM!  We were suddenly creating new groups and discovering new things about groupings of students and their noisemakers!  By doing this, we exposed that by changing the groupings, we flatlined on noise making.  The variable of similar groupings did not produce the sound vibrations that were produced in the differentiation of design that the original groups did!  And that was just the beginning of missed sciences!  So, lesson to learn-be prepared to pick out science features that you can cover with students as they are engineering and while you are testing their products.  It is there-you just have to look!  


Crafting instead of STEM

   
This STEM was fun and had lots of science, BUT it was a little too much for one teacher to handle!

In my Snowman Skiing STEM, I quickly discovered that the crafting overwhelmed the STEM process.  It's not that the snowmen weren't needed-they were!  However, I didn't need to put as much time into creating them as I did.  Next time, I'd get parent volunteers in to help with the entire process if I used hot glue again-or even better, I'd just get the right glue!  Then the kids could do it all!  Make sure you truly examine how much crafting is present because it can get in the way of what you planned for in your STEM.  You want their minds to be focused there, not so much on the craft of it all! 


Providing a Model 


This works both ways.  It is key that you examine the STEM you are working with and decide if a model is a good idea.  For instance, I really thought a basic model in the New Year's Noisemakers would not be needed.  However, I got a lot of similar ideas, many of which ended up being cup shakers and rain stick "style" noisemakers.  When I do this again next year, I will share some "models".  I will simply show them musical instruments during the planning stage as well as the video.  This way, it will broaden their "model" view and allow for more variety.  It is very important to weigh the model idea.  Giving too much information in our model presentation can also guide them too much.  So, be careful-but think it through too! 


Ignoring a Kid Solution

Open space at the bottom allowed the snowmen to ski correctly.

This happened during my Snowman Skiing STEM.  I couldn't figure out how to get those snowmen to ski onto the "snow" surface at the bottom.  They just kept falling over.  However, it never dawned on me until days later, during Winter Break, that the students had already solved this problem-in the pre-testing stage!  Over and over their snowmen simply skied down their slopes.  I literally woke up in the night with the realization that they had a solution to MY problem-that was really THEIR problem to solve-IF I HAD JUST ASKED!  I need to be asking students during the testing stage rather than dictating the things we are doing.  A deep thought to ponder!   


My plan caused the snowmen to fall over!  

Not Providing Time to Reflect


I had ever intention of reflecting on my STEMS.  I even built this into my products.  But intentions are not always matched.  You see, it was before break...yadah, yadah, yadah...  Why did I even listen to my own excuses!  This is so vital to their growth in this system, and yet, I talked myself out of it!  Reflecting allows students, just like us, the adults, to grow.  However, it comes natural to us.  Not so much for them!  I skipped this vital opportunity for students to grow and change.  So, I hear by pledge unto myself that I won't do this again!  Let them have that time!  It's key!  

I hope this will help guide you in not making the mistakes I have made so far.  I will say, it truly is an amazing process to engage in within your classroom setting.  There is usually little set-up and take down. Plus, the kids are so involved in it that they will think of things you never have and create things you've never imagined within these activities in your classroom!  I am currently awaiting the arrival of this book:


(Affiliate Link http://amzn.to/2C8Oknl )

I'm super excited to see what's inside.  Once I get going, I'll post a good review!  I'd love to hear what mistakes you have made of what books you use for STEM!  Drop me a comment to let me know!  


Pin for Later    


December 26, 2017

Giving Up The Writing Program: What I'm Doing Instead


Throughout your teaching life, you will have moments of discovery-about who you are and what you truly believe as a teacher.  I've had a number of those through my career.  The first one was that I would switch from the traditional method of reading and become a more "Balanced" Literacy Instructor.  Not in the sense that is today's "Balanced" Literacy (Which is a farce-but that's another blog post!) Another was when I discovered that I was truly a great writing instructor-because I loved to write and I learned from the very best!  Karen Padgett-may your retired teacher time be the VERY BEST, wherever you are!  Yes, I learned from a very wise and knowledgable peer!  Not some crazy writing program that everyone hates-but REAL teaching!  REAL TEACHING!  

So, when I found myself saying this, I was completely SHOCKED- "I don't know how to teach writing anymore!"  Yes, I said that-because I didn't.  You see, I've been bogged down in writing programs-Lucy Calkins, Write Traits, Top Score, Making Meaning Writing-you name it, it's come my way.  In that moment I realized I needed to STOP THE MADNESS and go back to the Karen Padgett way of life-write every week with a purpose!  Just Write! (Oh, wait, that was ANOTHER program I tried!)  


Here's how this breaks down day by day:

On Monday you introduce the prompt and plan.  That's it.  The key to this method is in the simplicity of each day.  When students get overwhelmed, they don't produce the writing you expect.  That is what I have learned over the years of teaching writing-small chunks for small kids produced the best results.  And so does planning!  So many people skip this part but it is the KEY to excellent results.  It takes the ideas for writing from higher order thinking to the knowledge level.  (Read more about it here!)  So, planning is KEY!

Tuesday is modeling day for the teacher and writing day for the kids.  Again, I take this in small chunks.  I start with proposing a grabber, or introduction, statement.  Here is something to keep in mind-kids WILL copy you.  That's what modeling is-the opportunity to show a technique.  If they copy it, so what!  Really, I mean that!  They will eventually venture off into something different-I PROMISE!  What you are doing is loading their tool kits with ideas.  You just have to remember that your introduction statement is no different than a list of ideas you would put in a writer's notebook.  Once I get the introduction started, I form my three ideas and add those to my paragraph.  I finish with a strong closing-again, a modeling technique that allows kids to grow their tool kits.  Then, I give students the time to write their introduction-and that's it!  And, yes, I do this week after week!  

Wednesday arrives with a little more writing.  I will often model my opening of the second paragraph.  Then I continue to write while students write their second and, many times, third paragraphs.  This is where I should take a moment and talk about the end of each writing period.  Students are always sharing throughout this process, in the form of the last 5 minutes of the writing period.  During this time I provide specific feedback as to what students have done correct in their writing.  I also provide ways to boost their writing.  This is the specifics of paint a picture with your words, using figurative language, boosting strong verbs, and any other opportunities that present themselves.  I always phrase these things in positives, such as, "One way to strengthen your writing would be...".  This allows students the opportunity to change their writing and for others to apply this same idea.  Many times, I open the writing period with this same technique.  

Thursday arrives as a time to complete any of the remaining body of the essay.  Again, I start with a quick modeling of what I am working on within my own writing.  Do not underestimate this part!  The more we model writing, the better it is for students.  And, it actually improves our own writing!  If we can grow as writers, we can help students grow!  Depending on the process we are at in writing, I may even model my conclusion.  This is where it gets tricky.  You don't want to jump into the conclusion until you are sure that you have modeled it time and again.  But, if we are on a short week, or Friday is heavy, then I will model this process at this stage.  

And, finally, FRIDAY!  As I just said above, on Friday we work to complete the conclusion.  This should always include a restate of the topic, followed by a reminder of the information inside for an expository or informational and an opinion piece.  For narrative, you are looking for a wrap of the ideas, the solution, and a lesson learned.  Model, model, model these ideas!  In addition to this, it is very important for students to then edit their work.  They need to read it out loud to others and check for spelling and grammar throughout the week.  

I am actually super excited to be going back to this method and seeing what my students can do.  Yes, by the end of all of this we will be moving into how to add information from readings into our work to get ready for fourth grade! But, this is where we are going to go  from where we have been!  No more programs, no more jumping around with ideas or things that are taught.  Just modeling, embedding instruction in real learning, and letting kids learn how to REALLY write!  Here's where I'm starting!  


You can find this in my Teachers Pay Teachers store and it will soon be part of my January Writing Prompt Bundle!  I hope you join me in this simplification of writing program, because it WORKS!  Let me know what works for you!  I'd love to hear your ideas!  

Pin for later! 


November 21, 2017

Gobbling up Some STEM Experiences!


One way to enjoy a holiday is through STEM activities.  I am just venturing into STEM and it seems like a perfect fit for Student-Led Learning.  While I was thinking about what to do with the two days before Thanksgiving, STEM came to mind!  Why not?!  The students' brains would not be able to do much, they would loose whatever learning we were doing over the long weekend, and, well, I would be just to tired to teach-period!  Also, I have viewed STEM as a fun adventure-up until creating and implementing one!  

I knew I wanted to think of my very own idea!  The way I learn how to create something new is by developing something from start to finish.  I have always been this way.  It allows my brain to cycle through a cycle.  I know that's a lot of cycles, but that is truly what it does.  Suddenly, the Turkey Hotline popped into my head and that's where I went-turkey thawing!  Yep, but HOW?!  How do I implement such a crazy thing for kids!  

Here's how it went down!  First, I shared the basic concept with my students. I designed the pages in the Holiday STEM:  Thaw a Turkey to be both printable pages and a PowerPoint presentation. 


Then they dove into the process.  I designed this with the idea that they would complete the activity in two days.  The first day, students worked through the Ask, Imagine, Plan, and Create stages.  This took very little time actually.  In less than an hour students had worked through these stages and created their thawing devices.  Here they are! 


So, where were the "turkeys"?  My school has a freezer in the office.  Once I got permission, I started the freezing process there.  Then, the second morning, I sent students to the "grocery store" to pick up the "turkeys"!  They all wanted to go!  Once the turkeys arrived, we took off the "wrapping" and got started!  

There were some interesting designs for SURE!  This group actually defrosted their turkey in 45 minutes.  This equaled an uncookable turkey!  Yep-they better have a different plan! 


This group finished in about two hours.  Out of nowhere their turkey exited the ice!  Yep-uncookable!  


These two groups didn't make it but their turkeys thawed within 15 minutes of "time".  We talked about how they would have a dinner, but they would have unhappy guests because the meal would be late!  


And this teams took an additional hour to thaw!  They would have very unhappy guests, because their turkey would not have been able to be cooked!  


Overall, they had an AWESOME time with this STEM.  We had just finished learning about states of matter and freezing points, so that is all they had to go with scientifically.  Our next unit is energy, including heat energy and insulators.  We will finish right before the Holiday Break!  Guess what we will be trying again!  Yep!  Students completed the  Imagine stage at the end of our STEM.  I am keeping their papers and will give them back with their new found knowledge and give it a go again!  I can't wait to see what they come up with!  


You can grab the Holiday Stem: Thaw a Turkey in my store, The Best Days.  I'd love for you to try it out!  And, feel free to share what kinds of STEM have you tried in your classroom.  I'd love to hear all about it!  Leave a note in the comments and have an AWESOME Thanksgiving!