Image Map
Showing posts with label Student Centered. Show all posts

October 31, 2019

Build a Game: A Super Easy Way to Include Student-Led Learning in Your Classroom

If you are like me, you are constantly looking for ways for students to prove that they understand a concept or skill.  To me, a test does not provide true understanding of a skill.  I like to have some kind of Project Based Learning to accompany a topic or skill that they have learned.  That's where Build A Game comes into play!  


Build a Game for Student-Led Learning


What's Build A Game?

Build A Game is a super easy way for students, and you, to create a project that shows their knowledge. Students create the game cards based on a subject you assign or a subject they are studying, maybe in Genius Hour.  Students must design all the parts to the game-from the rules to the questions.  It is completely designed by them!  


How Does it Work?

In my class, I assigned the skill for the Build A Game activity.  Students then worked alone to design their game. They met with friends to run through the game and make decisions about what worked and what didn't.  Then they took their game to final product.  This is where the rubric truly comes into play.  This product includes a rubric that can show students exactly what is expected.  Students should refer to the rubric each time they work, but especially when working on the final product.  This way students know the expectations as they work into their final product.


Let Them Struggle!

Build A Game is an uncharted territory for most kids. They may or may not have played a lot of board games in their life.  I do have my games available to them during this time to look at and think about rules, etc.  But, I don't provide a ton of support in these areas.  Students will learn more about problem solving when creating something like this than if I were to answer all of their questions.  Students will also seek out other students who are being more successful with designing these games, naturally creating leaders in this area.  That is one of the wonderful side effects of an activity like this-and, for you, as the teacher, it is then easy to discover strengths and weaknesses in students in general in an area that is new and different for them!  It's a win-win!  


Build a Game Sample project


So, give it a try!  After all, you never know where Build A Game will take you and your students!  You just might have an amazing time together as a class!  I'd love to hear what you think too!  Leave me a comment with your thoughts!  AND don't forget to follow my over at Facebook and Instagram to follow my classroom journey!  I'd love to have you!

Pin for Later


Build a Game for Student-Led Learning


October 24, 2019

Types of Stars-What You Just Might be Missing!

Types of stars is an interesting concept to teach.  While we think students understand the properties of stars, we can quickly build an understanding that each type of star brings a basic struggle for students to understand.  There are a number of reasons why!  Let's take a look at common misconceptions students have!


Color of Stars

The color of stars can confuse students. Think about our own perception of fire.   Fire glows red/orange and is hot, right!  We want to place a label on that-red/orange fire is hot.  Red/orange means hot in all aspects of our life-a stove is red/orange!  HOT-don't touch!  But, in reality, red/orange is cool in the range of heat output.  We just have this preconceived notion that RED means HOT! Stars that are red/orange are the coolest stars.  Blue and white stars are the hottest stars.  Kids are like us.  They want to apply red/orange stars as HOT, but they aren't.  This is a misconception that needs to be addressed when studying stars.  

Size of Stars

Bigger is better, right!  When it comes to types of stars-NOT TRUE!  Big stars a dying stars.  They have burned through their fuel and are heading toward death.  Small stars are fully fueled and are just beginning their lives.  This misconception needs to be addressed when studying stars!  

Distance of Stars

Stars appear on a plain - a flat "surface" to us.  Stars are really at a wide variety of distances from Earth, creating this misconception of a flat, one dimensional surface when we look at them.  And, after all, they are all the same size on that plane, right!  

See the problem of misconceptions building up!  These are REAL problems when teaching types of stars!!!  So, how do we address these misconceptions?   How about a STEM activity!  

Types of Stars STEM project

I developed this STEM to try and undo the misconceptions that I saw my students struggling with-the very ones I just shared with you!  I could not find a way to communicate the properties that we were discussing in a way that students grasped them at a deeper level.  There had to be some kind of hands-on activity out there!  But, there wasn't!  This Star STEM was birthed out of the very cosmos!  It had to make things easier - or so I thought!  

Starting Off Strong


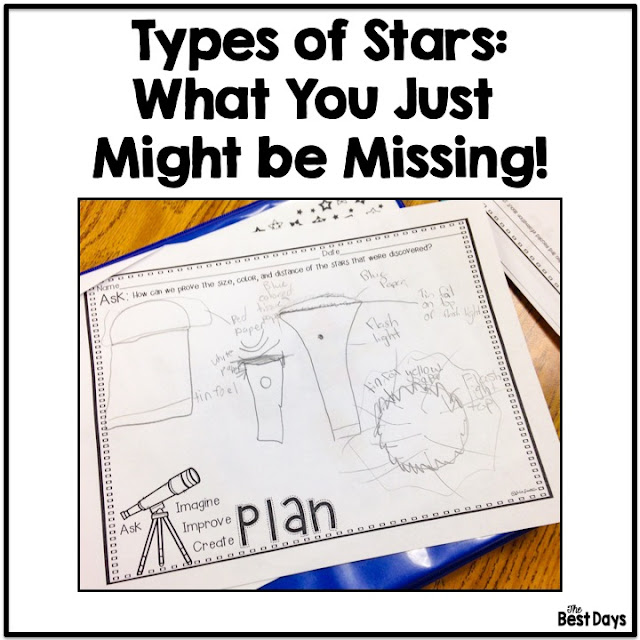
Star STEM planning page


Students were super excited to start this STEM!  They brought a variety of flashlights from home and I purchased some different sized flashlights for cheap at The Dollar Tree and other stores!  You will need flashlights from very small to very large to represent each type!  I also bought tissue paper and some other "star" making materials.  You will need packing tape-a lot of it-too!  Makes sense, right!  

WRONG!  Students jumped on the color first! They where using things like their red pencil boxes with the light shinning through it!  I would say ROUND and it was like I was speaking a different language-because color was key to them!  In fact, one team began creating this blue monster!  I couldn't figure out what in the world they were doing!  They not only missed ROUND, they missed a star is in space!  They were creating EARTH!  So, be sure they truly understand the properties involved.  Even though this was clearly discussed, and redirected to teams, it did not become the focus of what they were doing!  


Students were building the wrong type of star in this STEM picture.
Misconceptions can lead students away from the goal of learning when the 
concept is higher than we realize!


Finishing STRONG!  

We did get every team focused on the correct properties.  We did get every team creating one type of star that represented the size and color that they needed.  It was well worth the effort!  Because, next came testing!  And testing these was where it is AT!  Suddenly, they could SEE what happens in the night sky with distances!  We tested a number of combos of stars and locations in the room.  I had assigned "distances" in the classroom and set up Polaris as the closest star (my design was used for Polaris) on a chair in the front of the room.  As we changed out stars and students in "space" we were amazed to see how star sizes appeared the same and how color didn't matter to differentiate a size.  They blurred into one sky, even within the classroom!  I also used an iPad to take pictures so that we could flip the lights on and examine the evidence in picture form!  


In the end, we did finish strong with our study of types of stars!  We did internalize the idea that viewing them from Earth does not mean that they are all the same distance or the same size!  We did internalize that space has greater distances that can make the size of a star appear smaller than those closer to us! And that is what made this STEM so awesome!  It was the very objective that this lesson was supposed to show-because that one is the most complex of all the objectives in teaching types of stars!  
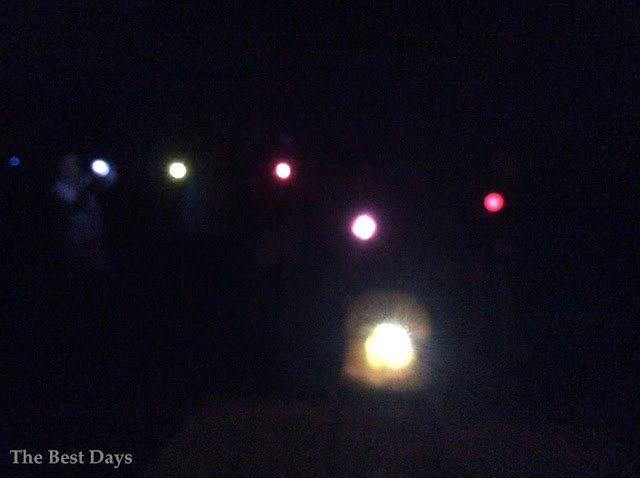

STAR STEM results
These stars are on a plane.  You can see that their size and color are shown.  These are Red Giants and Orange Stars.  

Star STEM testing by students.
Create Polaris to judge brightness and distance, just like real astronomers do!  


As always, let me know what you think!  I'd love to hear what you have done in your classroom with types of stars!  You can add a comment here or join me over at Facebook and Instagram to share your thoughts! I'd love for you to join me there!

(Find out how I hacked this rubric for my teacher observation here!)


Pin for Later


Types of Stars STEM


July 11, 2019

How to have a TWEET First Day of School! And Beyond!

Tweet, tweet!  The school year is about to start and you are wondering what to do to 1. Teach your students about your classroom and 2. Not bore them to death doing it!  Why not TWEET Your First Day of School!  Let's take a look! 


Tweet Your Classroom for the first day of school!

Teach Your Classroom


Students love getting up and moving the first day of school.  Plus, to be honest, they are just tired and need to move!  So, this fun little booklet gets the job done!  

There is some prep for you with this First Day of School activity.  Of course, printing the materials before the first day and assembling the booklets is key!  


Tweet Your Classroom Booklet


You also need to have students access some materials around your classroom.  For instance, I always have them "discover" the dictionaries, as these are going to be key in our learning.  Another great thing about this activity is that your students dive into the classroom library! During this time, I ask the kids to pick out four great books they find that they would like to read.  This preps the possibility of students being able to read later in the day when everyone needs a break! 


Students checking the library


Another thing this booklet does is gives the students an opportunity to talk to each other!  We tend to want to avoid this on the first day, BUT isn't that how we create community!  They need to get to know each other, even if some of them have been friends for years.  They still need to know what it is like in our classrooms.  Parameters can be established within this simple activity.  An example of this is how we talk to each other and how long within the classroom setting.  This activity will do that!  


Boy TWEETING their classroom


Plus, it gives you the chance to expose other areas of your classroom to the students.  I always have the students find the clipboards, because this is a key tool in our classroom.  I list the clipboard rules out and have them available for students to view when this activity is going on.   This way, students are able to know their location and know the rules that go with them.  


Tweet sign on a clipboard holder


The Secret is in the Tweets!  

You may have been reading this wondering how students know where to go!  Well, the secret to getting the students to the right location on the first day of school is to TWEET them!  


Tweet sign

Simply by putting up these cute tweet signs, students have a marker for where they are to go.  They also move around to find these tweets at different rates, so you won't have kids gathering in huge groups.  If you do, this is your opportunity to step in and express the need for them to move about and not be social, but to concentrate on completing the activity.  To be honest, this is the first step in developing your expectations in a way that is facilitative and allows them the opportunity to grow in success through redirection!  


What Else is There?

Every year I have tried to accomplish this entire product on the first day of school, but, well, I've failed!  So, there is MORE that can be done, even past the first day of school!  Here's what you get!  
Tweet Classroom Little Book


Tweet Tweet our Class is so Sweet Little Book helps your students understand rules and procedures!  Students get to reflect on what they are learning by writing it in their own words!  This can also double as a direction following activity, giving you an idea of what students are capable of doing with directions.  


Tweet Friend Venn Diagram


My Tweet Friend allows students the chance to work with a friend discovering things about each other by using letters in their names!  The kids LOVE this activity because it gives them a chance to interact with a friend and discover similarities about themselves!  For you, it can guide you in understanding how well kids can use and interpret Venn Diagrams from their past experiences and how their handwriting is in an open ended activity.  


Tweet Your Classroom


As you can see, there is so much packed into these first day of school activities that you can fill your lesson plans with them so quickly and easily!  Students just love them, and so will you!  Let me know what you think!  I'd love for a comment below about your first day of school activities!  Or, follow me on Facebook or Instagram to keep up with all the action!  

Pin for Later! 

Tweet Your Classroom Pin


Love the Bird Theme? Check out My Watercolor Bird Theme Decor and More!  


July 4, 2019

5 Patriotic Products to Make Any Elementary Student Celebrate!

As we approach any American Patriotic holiday, we want to bring that celebration into our classroom!  Whether it is during President's Day, Memorial Day, the Fourth of July, or even Labor Day, we are proud of our American Heritage!  Here are 5 Patriotic Products that will make any elementary student celebrate-or teacher too!  


Patriotic Products to make your celebrating easier!


Patriotic Product #1: Patriotic Scoot - Addition and Subtraction with Regrouping


Patriotic Scoot Cover

This product has kids up and moving while checking out patriotic pictures!  Kids just LOVE to play SCOOT!  There is a pre-made work page, so students can SCOOT with ease!  And, this is 3 digit by 3 digit problems, so late 2nd graders all the way up to 5th graders can benefit from this continued practice!  That's one way to make kids happy on a holiday and still get a skill practiced in math!  


Patriotic Product #2:  Primary and Secondary Source Superstars


https://www.teacherspayteachers.com/Product/Primary-and-Secondary-Source-Activity-4040718

Students will just LOVE this exploration of George Washington through Primary and Secondary Sources!  Students will take a virtual field trip and discover what Primary and Secondary Sources are through infographics! There is a leveled reading passage as well!  This is just a great way to celebrate America and learn at the same time! 


Patriotic Product #3:  Parade of States Project


Read more about this activity here!  

Who doesn't LOVE a parade!  Especially when the floats are created by your students!  This project is a great way for students to gain knowledge about our great 50 states and have a fun parade to teach others too!  Students research a state, create a float and research project, and, then, parade their state for all to see in a school-wide parade!  And, if states aren't your thing, you can always be patriotic with the National Park Float Parade!  


Patriotic Product #4:  Colonial STEM


Take a trip back to when America was just starting out!  Colonial America was an exciting time to be in America!  And, children had so many choices in toys-or, at least, to the toys that their imagination created!  And that's the basis of this STEM!  Students will use the "technology" of the time to create games or toys that students in Colonial America could play!  That means NO COPY CATS of toys of today!  Get your student's creative juices flowing with American pride through this STEM project!  


Patriotic Product #5:  Yeah and Nah Voting Sticks Freebie


Yeah and Nah sticks for voting


Students everywhere will LOVE voting just like our legislatures do!  And, even better, they can fly their Yeah or Nah high in the air with this freebie!  Simple to print and hot glue to tongue depressors!  Then, just pass out and vote away!  So much fun and FREE too!  

There you have it!  Five Patriotic Products to make any elementary student celebrate and learn in your classroom- for a holiday or any day!  Just let me know in the comments what you think or a great patriotic holiday idea you have!  And, jump on over to Facebook and Instagram to follow along with my journey through posts and product updates!  I'd love for you to join me! 

Pin for Later


Patriotic PIn


June 20, 2019

How to Use Project Based Learning to Put on a Parade!

Have you ever wondered how you could easily add a Project Based Learning activity to your classroom?  Are you wondering how to put the project on display?   Sometime it can be merged as one!  Simply put on a Project Based Learning Parade!  


Float Parade Blog Post header


Where to Start?

First, pick a theme!  Every parade has a theme, so a Project Based Parade should have a theme!  Dive into your curriculum to see what could be developed into a project with the outcome as a float-because that's the point of a parade, great floats!  Here are two ideas:  

State Park Floats:  This project explored both the state in general and the region of the US it is found in.  It is primarily to learn about the 50 States.


State Park Float


National Park Floats:  This project explored both the National Park's history and the ecosystems found there.  It incorporated the food chain found in the National Park.  


National Park Project float


You see, both of these have a rich research base.  So, another piece of advice when diving into your curriculum is to look for something with a rich research base.  State flags, maps, park outlines, dates, ecosystems, tourist spots, etc. are all parts of the research base for this kind of project.   What topic are you studying that can allow for this rich base to be met?


Technology Integration

Next, you need to think about how much technology integration do you want?  Students can create research outcomes to accompany the float through the use of technology.  PowerPoints and other documentation can be help students to organize and present the information that they need beyond the actual parade float.  Consider this in your decision making process.

State Project


National Park Project


A post shared by Julie from The Best Days (@thebestdaysclassroom) on


Research Time

Questions about Research Time include how much of a guideline do you want to provide, how much time do students need, and do you want them to complete research in class or at home?  This will also determine your lesson plans and the development of your research questions.  This last point is key to where students go.  Scaffolding them in their research will help them to feel successful throughout the process, whether completed at home or at school! 


National Park Pages Preview of student work


Presentions

Next, you will want to think about how the presentations in class will be planned and what you will need for them.  Developing a rubric is SO important to this part-and the whole!  Research says that when teachers provide  a rubric, students can succeed at a greater rate.  Plus, it eliminates any negotiation for students who do not complete the task.  So, develop that rubric and get it into students hands!  


National Park Project Teacher pages


Once you are ready to present, have volunteers go first.  Students who are comfortable presenting will boost other's confidence and provide a foundation for others.  I try to pick students I know will offer great presentations so that others see and know what the expectations are.  This will often spur them into practicing more too!


The Parade

Finally, coordinate the parade beforehand!  This means you should send our emails to your staff to let them know the day and time you will be parading!  Students in other classes give the project builders the ooo's and ahh's that just make them feel successful!  Visit as many grade levels and classes as possible!  This means lots of eyes on their projects and a desire to make projects in the future!  That's a key to great project success!  


Once you have engaged in a Project Based Parade you will fall in love and want to do it every year!  Here are two projects to get you going - they provide everything you need for a great project parade!  


State Float Park Parade


National Park Float Parade Project


As always, I'd love to hear from you and what you like to do for Project Based Learning!  Drop a comment below or follow me over at Instagram or Facebook for classroom updates!  

Pin for Later:  


Float Parade Pin