Image Map

December 26, 2017

Giving Up The Writing Program: What I'm Doing Instead


Throughout your teaching life, you will have moments of discovery-about who you are and what you truly believe as a teacher.  I've had a number of those through my career.  The first one was that I would switch from the traditional method of reading and become a more "Balanced" Literacy Instructor.  Not in the sense that is today's "Balanced" Literacy (Which is a farce-but that's another blog post!) Another was when I discovered that I was truly a great writing instructor-because I loved to write and I learned from the very best!  Karen Padgett-may your retired teacher time be the VERY BEST, wherever you are!  Yes, I learned from a very wise and knowledgable peer!  Not some crazy writing program that everyone hates-but REAL teaching!  REAL TEACHING!  

So, when I found myself saying this, I was completely SHOCKED- "I don't know how to teach writing anymore!"  Yes, I said that-because I didn't.  You see, I've been bogged down in writing programs-Lucy Calkins, Write Traits, Top Score, Making Meaning Writing-you name it, it's come my way.  In that moment I realized I needed to STOP THE MADNESS and go back to the Karen Padgett way of life-write every week with a purpose!  Just Write! (Oh, wait, that was ANOTHER program I tried!)  


Here's how this breaks down day by day:

On Monday you introduce the prompt and plan.  That's it.  The key to this method is in the simplicity of each day.  When students get overwhelmed, they don't produce the writing you expect.  That is what I have learned over the years of teaching writing-small chunks for small kids produced the best results.  And so does planning!  So many people skip this part but it is the KEY to excellent results.  It takes the ideas for writing from higher order thinking to the knowledge level.  (Read more about it here!)  So, planning is KEY!

Tuesday is modeling day for the teacher and writing day for the kids.  Again, I take this in small chunks.  I start with proposing a grabber, or introduction, statement.  Here is something to keep in mind-kids WILL copy you.  That's what modeling is-the opportunity to show a technique.  If they copy it, so what!  Really, I mean that!  They will eventually venture off into something different-I PROMISE!  What you are doing is loading their tool kits with ideas.  You just have to remember that your introduction statement is no different than a list of ideas you would put in a writer's notebook.  Once I get the introduction started, I form my three ideas and add those to my paragraph.  I finish with a strong closing-again, a modeling technique that allows kids to grow their tool kits.  Then, I give students the time to write their introduction-and that's it!  And, yes, I do this week after week!  

Wednesday arrives with a little more writing.  I will often model my opening of the second paragraph.  Then I continue to write while students write their second and, many times, third paragraphs.  This is where I should take a moment and talk about the end of each writing period.  Students are always sharing throughout this process, in the form of the last 5 minutes of the writing period.  During this time I provide specific feedback as to what students have done correct in their writing.  I also provide ways to boost their writing.  This is the specifics of paint a picture with your words, using figurative language, boosting strong verbs, and any other opportunities that present themselves.  I always phrase these things in positives, such as, "One way to strengthen your writing would be...".  This allows students the opportunity to change their writing and for others to apply this same idea.  Many times, I open the writing period with this same technique.  

Thursday arrives as a time to complete any of the remaining body of the essay.  Again, I start with a quick modeling of what I am working on within my own writing.  Do not underestimate this part!  The more we model writing, the better it is for students.  And, it actually improves our own writing!  If we can grow as writers, we can help students grow!  Depending on the process we are at in writing, I may even model my conclusion.  This is where it gets tricky.  You don't want to jump into the conclusion until you are sure that you have modeled it time and again.  But, if we are on a short week, or Friday is heavy, then I will model this process at this stage.  

And, finally, FRIDAY!  As I just said above, on Friday we work to complete the conclusion.  This should always include a restate of the topic, followed by a reminder of the information inside for an expository or informational and an opinion piece.  For narrative, you are looking for a wrap of the ideas, the solution, and a lesson learned.  Model, model, model these ideas!  In addition to this, it is very important for students to then edit their work.  They need to read it out loud to others and check for spelling and grammar throughout the week.  

I am actually super excited to be going back to this method and seeing what my students can do.  Yes, by the end of all of this we will be moving into how to add information from readings into our work to get ready for fourth grade! But, this is where we are going to go  from where we have been!  No more programs, no more jumping around with ideas or things that are taught.  Just modeling, embedding instruction in real learning, and letting kids learn how to REALLY write!  Here's where I'm starting!  


You can find this in my Teachers Pay Teachers store and it will soon be part of my January Writing Prompt Bundle!  I hope you join me in this simplification of writing program, because it WORKS!  Let me know what works for you!  I'd love to hear your ideas!  

Pin for later! 


December 20, 2017

New Year's STEM: Exploring SOUND Energy!


Happy New Year everyone, even if it is a little early!  Or, you may be joining me for a look at this STEM based off a duplicate product found in my store!  Either way, be prepared for some FUN with STEM and Sound Energy! 

In this STEM you will find the following steps:  Ask, Imagine, Plan, Create, and Improve.  I have also included a chance to Reflect on this STEM though a quote provided to inspire deeper thinking about this activity.  It is important to know that while STEMS come with a variety of step models, each of these models cover the same principles within STEM.  The key is that students apply the principals of creativity and engineering.  Students should be developing systems and ideas based on what they see as the best form of applying their personal skills and the concept presented to them in the challenge at hand.  That means you are as hands off as possible.  The only thing I really did in this STEM was to manage supplies, cut the duct tape (because it is REALLY sticky), mark the results, and vacuum after the clean-up (More on how to avoid this from my lesson learned to come!)  So, here we go!

First, students were able to apply their understanding of sound energy from their schema from our lessons in class and from the video suggested in the product found here.  This is the ASK stage!


In the product, you will find an open note taking page and a guided notes page.  With my third graders I use the guided page.  I also let them watch the video once through without taking any notes.  Then, I stopped it at spots so they could write down what they learned because she talks REALLY fast!  You could always swap out this video with another, as the Powerpoint allows you to embed any video you choose (directions are included).

Once my students worked through the ASK stage, they moved to Imagine.  This is where students had to think about the Criteria and Constraints involved in this activity.  In other words, what the could and could not do.  These are established to keep students within a boundary so that they are not getting off task and wasting time going down bunny trails or even socializing.  In this STEM, one of the Criteria is that they must have different designs for each team member's noisemakers.  This was key, as one team got off target because, during create, they decided they liked another noisemaker better.  They all wanted it and headed down that bunny trail.  I was able to redirect back to the criteria to get those students back on their PLAN!


Yes, that's the next step, PLAN!  In Imagine, students are simply brainstorming all of the possibilities that they have.  This PLANning stage allows them to square up the actual plan they have.  In this case, this is where students developed a specific system to make noise and decided on what supplies they needed.  I supplied them with beans, rice, cereal, duct tape (needed but STICKY), paper towel rolls, gift wrap rolls (A parent brought them in!), paper plates, jingle bells, fabric, embroidery hoops, cups, tongue depressors, staplers, regular tape, and glue.  Then I opened my classroom cabinets to them with the understanding that it couldn't be anything that I needed back from them!  Many of these things were already in my room.  I did utilize parents for some of the things that needed to be purchased (beans, rice, cereal, jingle bells).  I gave them a good amount of time to plan.  They did a very good job of planning and knew what they needed when we moved onto CREATE!


CREATE is the time that they will actually BUILD their noisemaker.  I provide a half hour for this step.  This seems to be a fair amount of time for all groups to be able to be ready, based on the STEMS that I have completed so far.  This did not include the time I used to pass out supplies.  I did this pre-CREATE.  I had student team members come to a table area and pick up supplies such as the rice, beans, and cereal.  This is where I didn't think!  Before they started CREATE,  I should have laid down large pieces of bulletin board paper.  We had a little bit of a mess from kids not knowing how to pour the materials.  I was able to show them how to make paper funnels after I discovered that pouring didn't work so well.  I would definitely suggest this for your classroom before you begin!  I haven't vacuumed in years, as we have wood floors at home and I sweep!  It was an experience for sure!  Anyways, students went fully into CREATE mode and were able to complete this step within the half hour provided!

STEM, Noisemakers, Student-Led Learning 

Now it was time to test their systems!  Included in the product is a fun slide in the Powerpoint just for this!  It includes a website specifically designed for detecting sound levels in the classroom with a fun graphic-Bouncy Balls!  I used this and set the bouncy balls on the lowest amount available.  Then I explained we would use the large bouncy balls, as these are the hardest to move!  I also explained to students that they were not to make ANY noise with their voices (unless they made a horn type of noisemaker) because 1.  they could be helping another team win or 2.  they would be getting a false read on their noisemakers.  Then I stood at the board and marked the three highest bouncy balls that each team achieved!  This is how we judged the assigned group winners!


What we did next was even more fun, and this is also where we got into some serious science application!  I allowed kids to group randomly and we tried it again!  And we got totally weird results.  Weird in the fact that we were able to see how variables affect an experiment.  When students were randomly grouped, meaning they were with similar equipment made by other students, our data flatlined!  They were not able to create sound higher than the original groups of differently designed noise makers.  More importantly, they got a hands-on experience with variables!  I love that we could apply that science term and skill in this very minute!  Real life application!


Next, we headed to IMPROVE!  Students were able to look at all the different noisemakers and discuss and plan for even better noisemakers.  Also included in this was an opportunity to reflect.  IMPROVE doesn't always have to be about the STEM.  It should also be about how they could be better as students-with each other and within creating and growing.  Right now I'm getting a lot of "we worked good as a team" instead of those deeper reflections as a cooperative group.  That is going to be one of my goals as we get more and more into learning about how we work together in STEM and how this connects to us working as a team in other areas of our classroom.

I'm totally excited to add STEM to my growing knowledge of the Student-Led Classroom.  I can honestly say, I can see this being key in the development of how students lead in a classroom setting.  If you'd like to learn more about Student-Led Classrooms, jump over to my general post called Just the Place to Start.   Are you interested in checking out my growing STEM products?  Check them out over at my store, The Best Days!

More importantly, thanks for stopping by.  I'm super excited you did and would love to hear any feedback you have about STEM or this idea, in general.  I'm still learning and would love ideas, suggestions, and even improvement ideas you may have!


November 21, 2017

Gobbling up Some STEM Experiences!


One way to enjoy a holiday is through STEM activities.  I am just venturing into STEM and it seems like a perfect fit for Student-Led Learning.  While I was thinking about what to do with the two days before Thanksgiving, STEM came to mind!  Why not?!  The students' brains would not be able to do much, they would loose whatever learning we were doing over the long weekend, and, well, I would be just to tired to teach-period!  Also, I have viewed STEM as a fun adventure-up until creating and implementing one!  

I knew I wanted to think of my very own idea!  The way I learn how to create something new is by developing something from start to finish.  I have always been this way.  It allows my brain to cycle through a cycle.  I know that's a lot of cycles, but that is truly what it does.  Suddenly, the Turkey Hotline popped into my head and that's where I went-turkey thawing!  Yep, but HOW?!  How do I implement such a crazy thing for kids!  

Here's how it went down!  First, I shared the basic concept with my students. I designed the pages in the Holiday STEM:  Thaw a Turkey to be both printable pages and a PowerPoint presentation. 


Then they dove into the process.  I designed this with the idea that they would complete the activity in two days.  The first day, students worked through the Ask, Imagine, Plan, and Create stages.  This took very little time actually.  In less than an hour students had worked through these stages and created their thawing devices.  Here they are! 


So, where were the "turkeys"?  My school has a freezer in the office.  Once I got permission, I started the freezing process there.  Then, the second morning, I sent students to the "grocery store" to pick up the "turkeys"!  They all wanted to go!  Once the turkeys arrived, we took off the "wrapping" and got started!  

There were some interesting designs for SURE!  This group actually defrosted their turkey in 45 minutes.  This equaled an uncookable turkey!  Yep-they better have a different plan! 


This group finished in about two hours.  Out of nowhere their turkey exited the ice!  Yep-uncookable!  


These two groups didn't make it but their turkeys thawed within 15 minutes of "time".  We talked about how they would have a dinner, but they would have unhappy guests because the meal would be late!  


And this teams took an additional hour to thaw!  They would have very unhappy guests, because their turkey would not have been able to be cooked!  


Overall, they had an AWESOME time with this STEM.  We had just finished learning about states of matter and freezing points, so that is all they had to go with scientifically.  Our next unit is energy, including heat energy and insulators.  We will finish right before the Holiday Break!  Guess what we will be trying again!  Yep!  Students completed the  Imagine stage at the end of our STEM.  I am keeping their papers and will give them back with their new found knowledge and give it a go again!  I can't wait to see what they come up with!  


You can grab the Holiday Stem: Thaw a Turkey in my store, The Best Days.  I'd love for you to try it out!  And, feel free to share what kinds of STEM have you tried in your classroom.  I'd love to hear all about it!  Leave a note in the comments and have an AWESOME Thanksgiving!  


August 4, 2017

Student-Led Learning: Classroom Design and Open Seating

Have you heard of Open Seating?  I hadn't and my first reaction was that it was just another name for Flexible Seating.  Was I surprised when I read that it was not!  Was I even more surprised when I decided it was just right for me!

Open seating, classroom design, student-led learning, student centered, classroom climate


I was tooling around the Net when I happened upon THIS ARTICLE from Scholastic.  The idea intrigued me, but, to be honest, I thought htis lady was NUTS!  Letting kids pick their own seats!  Well, the more my Professional Learning Community discussed this, the more it seemed to fit into the Student-Led Learning model.  We wisely began to look closer at this model and we decided to incorporate one more idea into this.  REFLECTION!  If kids really thought about what worked for them in seating, if kids really thought about location and issues with others around them, could they actually do this?  Could we trust them with this wisdom!  So, we made a decision!  We are trying it out!

With this came the idea that came the fact that students needed a way to be guided and to reflect upon the seats they were in.  Open Seating Posters and Reflection was built upon that idea.  Here is a little video explaining how I set up my classroom and how Open Seating will be used.  Sorry about the VERY quick change over! I'm still learning video!  


July 18, 2017

Student-Led Learning: What Does the Research Say?


competency-based pathways, classroom climate, student-led research, research,


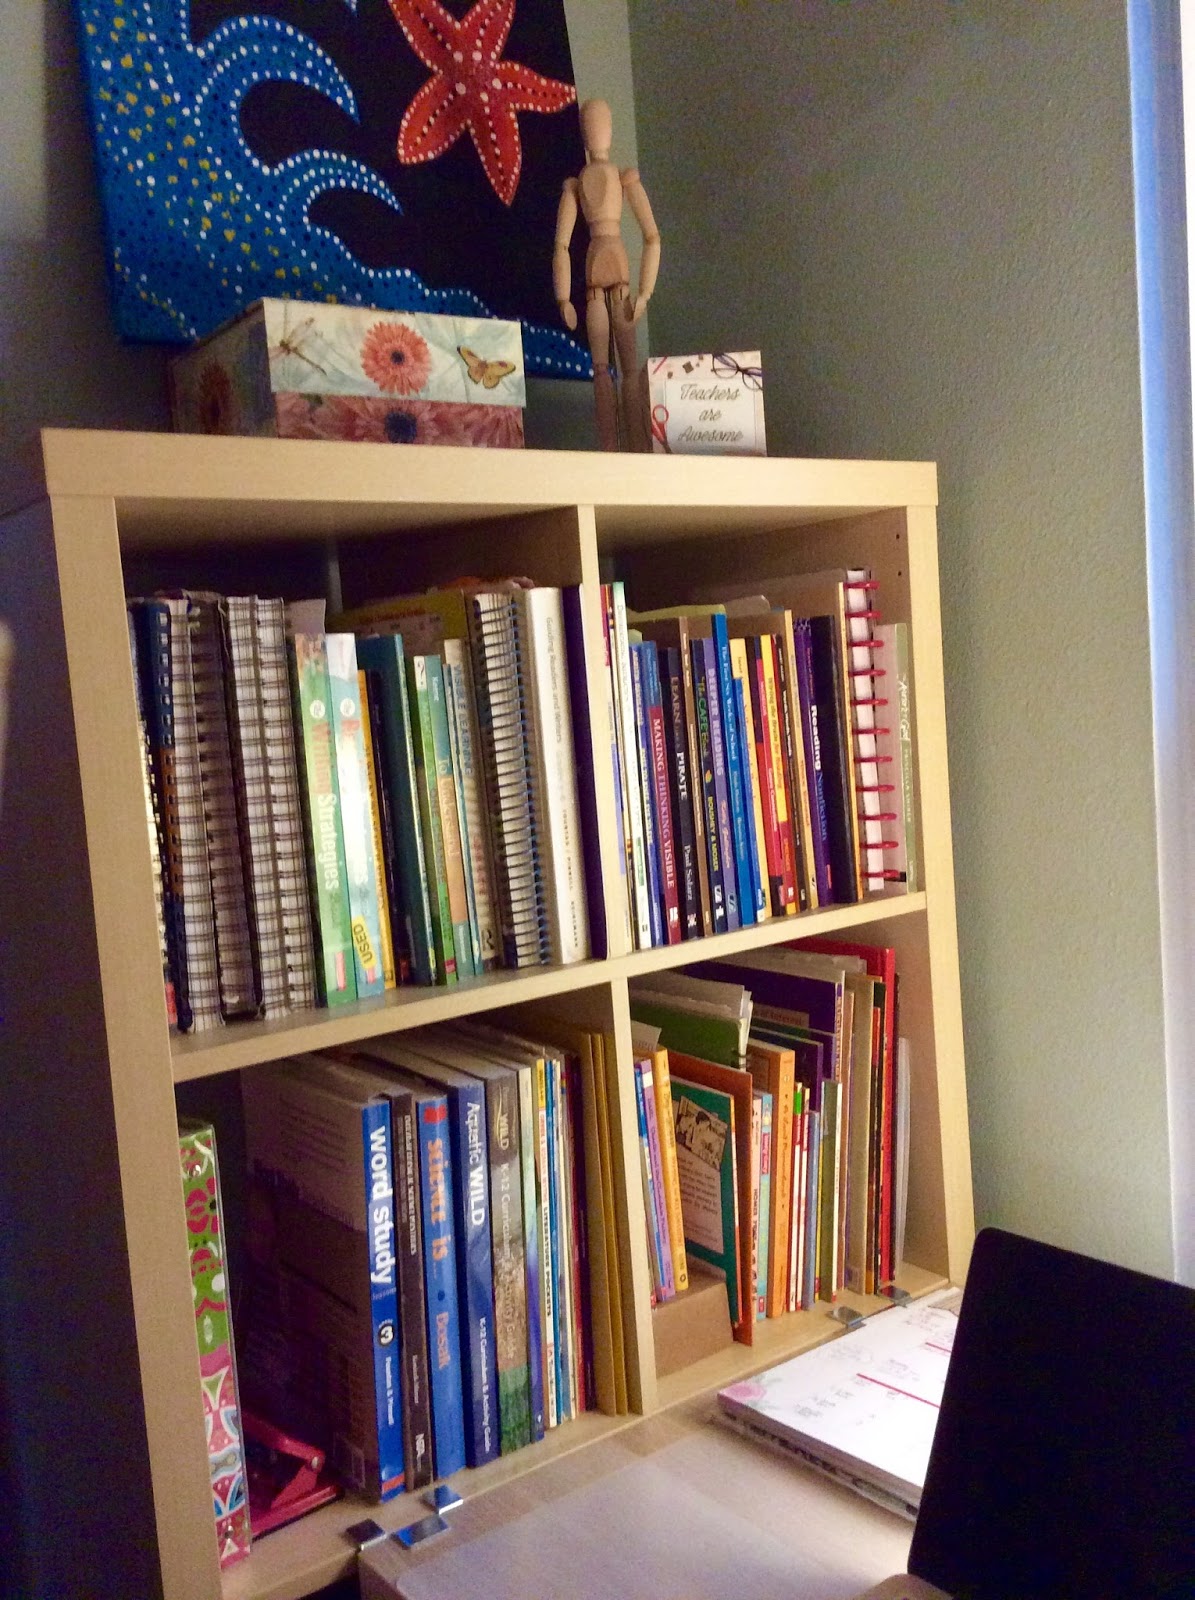
"Ugh," I just have to say it, "UGH!" This is probably the hardest blog post I've ever written. Can I say, I really do love research. This is a picture of most of my collection of professional books. (Finally in one space!  Some, truly, are still at school-about 20 more!  Yep, I have a problem!)  

I've read most of these from the front to the back! Some are new and I'm working my way through.  So, I'm very familiar with research.  The UGH of this post is finding research about the actual practices of Student-Led Learning.  With that being said, we are going to start off this little look with...John Hattie!  

You have to give this man kudos! It isn't rocket science to take all the best research and find out what it says, together, in one place!  If you haven't heard of Hattie, this is exactly what he did.  Gather it up, synthesize it, and spit it out so teachers know what is best. Yet, we, as teachers, have barely heard of him!  Now, I have to admit, I don't have the most up to date book either, but fact is fact, there are some key points to Student-Led Learning that are targeted in his synthesis of studies.  They parallel claims made by the author's of Fearless Learners.  Let's take a look, shall we!

(Please note:  I have not taken these claims word for word from the text.  I have synthesized myself and put their ideas into my own words!)


Claim #1:  Students understand and can explain the mastery of standards.

Hattie:  Self-Report of Grades 1.44 (High Impact)
This is the highest impact on learning in Hattie's book.  It DOES NOT mean that kids are explaining their grades.  What it means is that students have views of themselves and how they learn. The level of achievement they believe they have directly impacts what they do.  Student-Led Learning allows students to feel successful, makes them aware of what they have mastered, and builds their self-belief systems.  I believe that this directly impacts their ability to walk into another grade level believing they are better, stronger students, even if it isn't a student-led classroom!  


Claim #2:  Students master materials instead of working through units at a teacher paced learning outcome.  

Hattie:  Mastery Learning 0.58 (High Impact)
This claim states that if students are provided with clear explanations of what it means to master the material, they will learn with more success.  This one comes with some tie-ins.  There include cooperation with classmates, classroom climate, lots of feedback, corrections of mistakes, and using diagnostic formative tests.  Interestingly enough, these are all claims made by the author's of Fearless Learners!  The little I have done with student-led learning also points to this being a valid claim!  SCORE!


Claim #3:  Students improve verbalization of skill understanding and self-question in the classroom.  

Hattie:  Self-Verbalization and Self-Questioning 0.64 (High Impact)
In one study that Hattie read, self-verbalization was among the highest returns in student strategies!  This is key in task oriented skills, such as writing and mathematics!  Awesome!  And, as far as questioning goes, it shows that the return for students is biggest in the lower ability and special education students in the study! Win/Win!!!  


Claim #4:  The teacher/student relationship grows and is key to the learning in the classroom.  

Hattie:  Teacher-Student Relationships 0.72 (High Impact)
Both authors in the text specifically discuss how much their relationships with their students change.  From my experiences with this type of learning, I have to agree.  Their needs and feelings become a core part of the classroom, creating a key community of learners that support each other without the teacher's interventions. They thrive.  According to Hattie's work, this is called a person-centered teacher.  This person-centered teacher builds a classroom of respect that allows for fewer resistant behaviors and higher achievement is the outcome! Who knew!  The key to all of this-the teacher needs to facilitate students' development within the classroom through empathizing with the students and providing feedback to self-assess, feel safe, and learn to understand other students in the classroom as well!  I'd call that a Student-Led Classroom for sure!  


Claim #5:  Students are able to meet goals they set for themselves.  

Hattie:  Goals 0.67 (High Impact)
According to the author's of Fearless Learners, goal setting is found throughout the student's day, week, month, and year in a student-led classroom.  This comes from the schedule they build each day for the next and all the way through each academic task and activity that they do.  Hattie's research says that they provide the link between the past and the future.  This is most valuable when students and teachers set challenging rather that "do your best" goals!  The most important thing in goal setting is the difficulty of the goal.  It directly connects to the performance of the person who sets that goal!  The student-led classroom is full of goal setting opportunities, making it, yet again, a classroom reaching for success simply by the make-up of design!  

And, there you have it in a Hattie nut-shell!  Oh, there's a lot more out there, and I'm reading up on a few more great research moments.  I think that's where the UGH really lies. This one was easy to locate and understand, which is what makes Hattie's books even nicer.  I look forward to sharing more information with you as I research deeper into this.  I can't promise that any time soon, because I'm finding some really meaty stuff!  Anyways, let me know what your thoughts are about this research and your experiences with the Student-Led Classroom!


July 13, 2017

Where Can I Find More Information on Student-Led Learning!

student centered learning, classroom climate, students as leaders, student centered resources

We are always looking for great resources as teachers, but I've found that discovering Student-Led Learning resources are not that easy.  I've found tons of information on Pinterest about Student-Led Conferences, but very little on Student-Led Learning.  However, I've found some excellent sources!  Here's a round-up of some great sources out there!  

The Student Centered Learning Podcasts

These podcasts share the stories and ideas found in a variety of learning ranges.  They are easy to listen to and provide personal experiences within the Student-Led classroom settings!  Follow them on Facebook as well!  


Models of Excellence


This amazing site provides great exemplars from REAL students who have gone through the Student-Led Classroom model!  This site is a MUST to save and come back to often!  


Edutopia 


I have a number of great articles about Student-Centered Learning at Edutopia! Be sure to check it out, including this great article, A Case for Student-Centered Learning!

Personalized Learning Toolkit  


There are some AWESOME materials on this site to get started mentally thinking about the transition!  It is WONDERFUL!!  

EWA:  Student Centered Learning


This is an amazing site full of articles to get you going on your journey!  

And, finally, 
Students at the Center Hub


This is, literally, a HUB of EVERYTHING you need! There are articles, tool-kits, inservice materials, places to connect, and more! Fabulous!

And for more about my journey with Student-Led Learning, you can check out my overview of posts at 


student centered learning, student centered learning sources, student-led learning sources, student-led learning research,

Be sure to stop by and check out more posts as I share my experiences with Student-Led Learning!  Take a moment to leave a comment of any great sites you find or sharing your experiences too!  I'd love to hear from you!  


July 11, 2017

Student-Led Learning: Celebrate Good Times, Come On!!

Student Centered, classroom climate, classroom design, students as leaders, celebrate learning, fearless learners

You may be joining me for the first time or you may be joining me by following along in this series of posts about Fearless Learners, but I welcome you all to the CELEBRATION!  Yes, that's Step 6 in the books we've been enjoying this summer-Celebrate!  It's time!

Sutton and Westberry have done it again in this chapter!  There is no way you can't get through this text without knowing, deep down inside, that you can do this thing, this Student-Led Learning thing!  You feel grounded and passionate and READY even with so much to think about and/or prepare!  That is something to celebrate!!

But, be prepared!  You will meet resistance and get "those" looks!  It happened to me at a recent inservice.  I just mentioned the Student-Led Learning model at my last inservice to my table teachers and two things happened.  The younger teacher turned to her computer and started looking at the dieting website she was exploring and the older, almost retired teacher rolled her eyes.  This was NOT the first time in these four days this exact thing happened with the two of them!  The whole premise of the inservice SCREAMED Student-Led Learning and each time one, if not both, said, "My students could NEVER do that!" Why, you ask-they were from Title 1 schools!   Yet, research shared in Make Just One Change by Dan Rothstein and Luz Santana points to something else!  You see, I'm making a connection here that Student-Led Learning falls into the category of creating divergent thinkers!  It IS the ability to generate a wide range of ideas, options, hypotheses, and possibilities!  It is the combination of convergent thinking and metacognition!  It is all of this and more!  So, what do they say about the students that these teachers were speaking of?  Here's what they found, "Divergent thinking is almost always seen as a gift rather than an acquired and developed skill.  But this view is far from the truth:  divergent thinking is a distinct form of higher-order thinking that can be taught to all ages and all students....low academic performance showed an ability to learn divergent thinking and gained greater self-confidence in their overall abilities the more they practiced."  Let's celebrate THAT!  Stop thinking that your students CAN'T and let's celebrate that research says THEY CAN!  Give this model a try-it may very well surprise you and your students!  

And, with that, I am a little perplexed right now as to HOW I'm going to celebrate successes.  I have to say, this has always been my weak spot.  I always give high-fives, etc. as students learn, but it is important within the class for students to celebrate each other.  So, my first week I'm going to practice what I've read and let some control go over all the steps in this process.  I am going to recruit the help of my students to develop a plan for this.  It is leaving me with a pit feeling in my stomach, but it's my first big step into what I can't see.  And, yet, I know I will be celebrating the awe of seeing my new third graders make decisions that will impact us for the whole school year! After all, it is their class, not just mine!  

Let me know what you think by leaving a comment with your successes or even your fears about this process!  It's going to be an awesome journey this school year, so stop back by!  I'm not even ready to end this this summer, so expect more posts as ideas and new knowledge found comes my way!